Development Environment Setup (Forge)
The first step for a vNext developer is installing the vNext Forge VS Code extension. Runtime setup, domain (project) creation, Workflow CLI integration, and environment management are all driven through Forge — no need to wrestle with docker-compose files or CLI commands by hand.
Forge doesn't work alone; behind the scenes it manages two components in an integrated way:
- vNext Workflow CLI (
wf) — deploying components to the runtime (publish,wf update) and domain registration go through Forge's CLI integration. - vNext Runtime — when you add a local environment, Forge installs the runtime on your behalf, starts/stops it, and monitors its health.
So when you hit a CLI- or runtime-related problem, look for the fix in the corresponding repo docs: vnext-workflow-cli for CLI issues, vnext-runtime for runtime issues. Forge surfaces most errors, but the remediation steps live in those repos' documentation.
1. Install the vNext Forge Extension
- Open the Extensions panel in VS Code (
Cmd+Shift+X/Ctrl+Shift+X). - Search for "vNext Forge" and click Install.
- After installation, the vNext Forge Tools icon appears in the left Activity Bar.
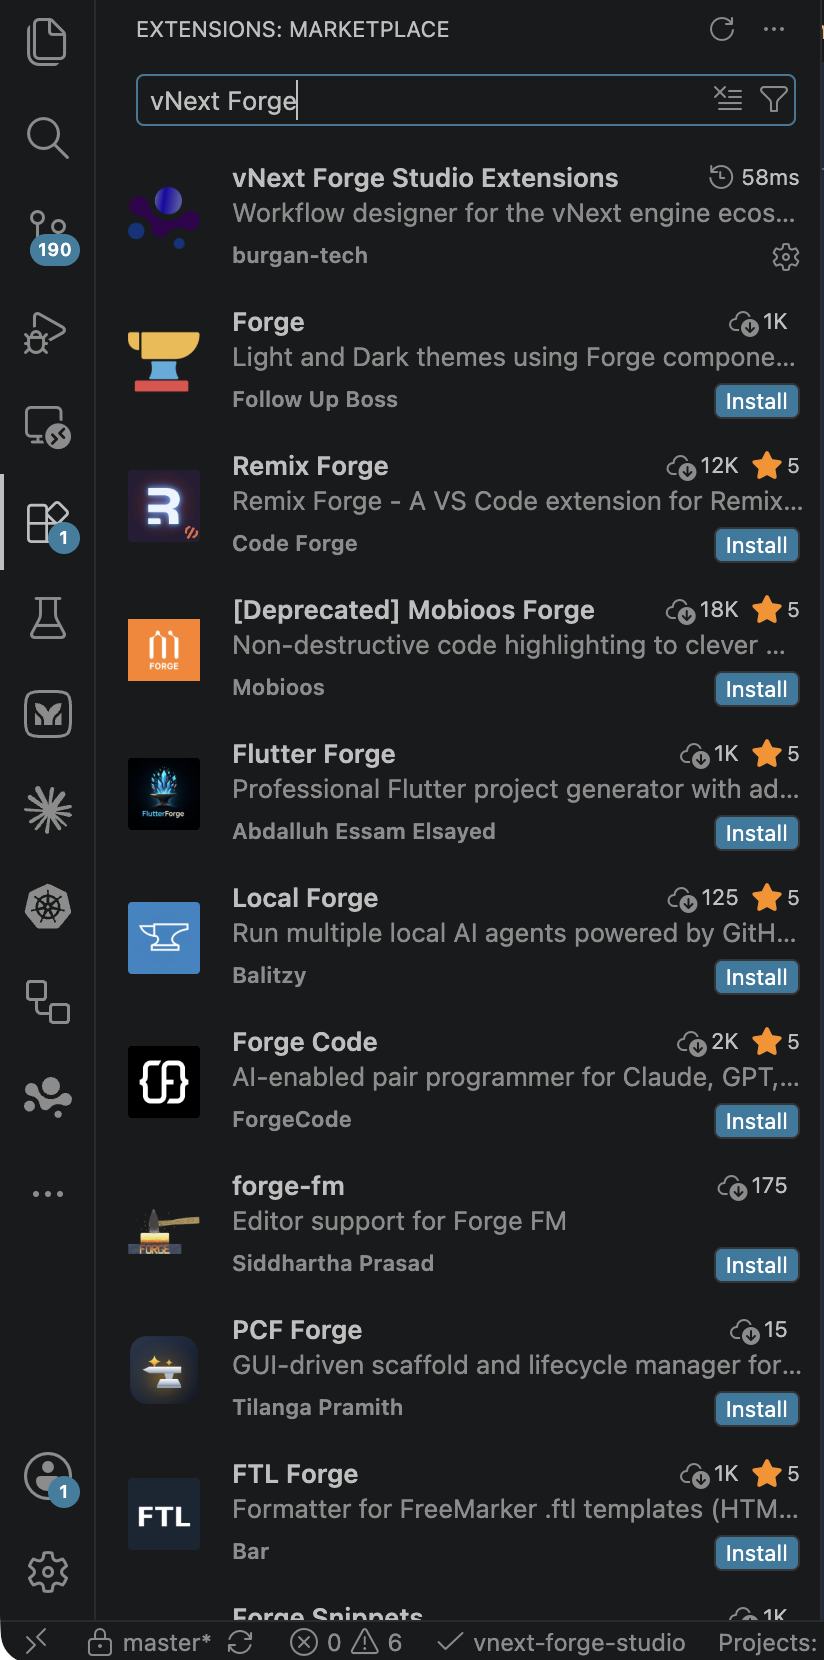
The extension activates automatically when it finds a vnext.config.json in the open workspace and shows all panels; if there is no project yet, only the Settings and Create Project panels are visible.
2. (Optional) Install the AI Plugin
For AI-assisted development, install the vNext AI Toolkit Claude Code plugin:
claude plugin marketplace add burgan-tech/vnext-ai-toolkit
claude plugin install vnext-ai-toolkit@burgan-tech
The plugin ships agents that run the analyze → design → author → validate → security-review pipeline, plus skills like workflow-scaffold, schema-design, and view-design.
3. Create a Project
You can create a project (domain) in one of two ways:
Option A — With AI (vnext-init)
Open your project folder in Claude Code and run the init command:
claude /vnext-ai-toolkit:vnext-init
This scaffolds the base project with the official @burgan-tech/vnext-template CLI, then layers the toolkit files on top: docker-compose + MockLab, CLAUDE.md, .http API tests, and integration tests.
Option B — With Forge Tools (Create Project)
- Click the vNext Forge Tools icon in the Activity Bar.
- In the Create Project panel, click Create vNext Project.
- Enter the domain name and target folder — Forge scaffolds the project with
@burgan-tech/vnext-templateand opens the workspace.
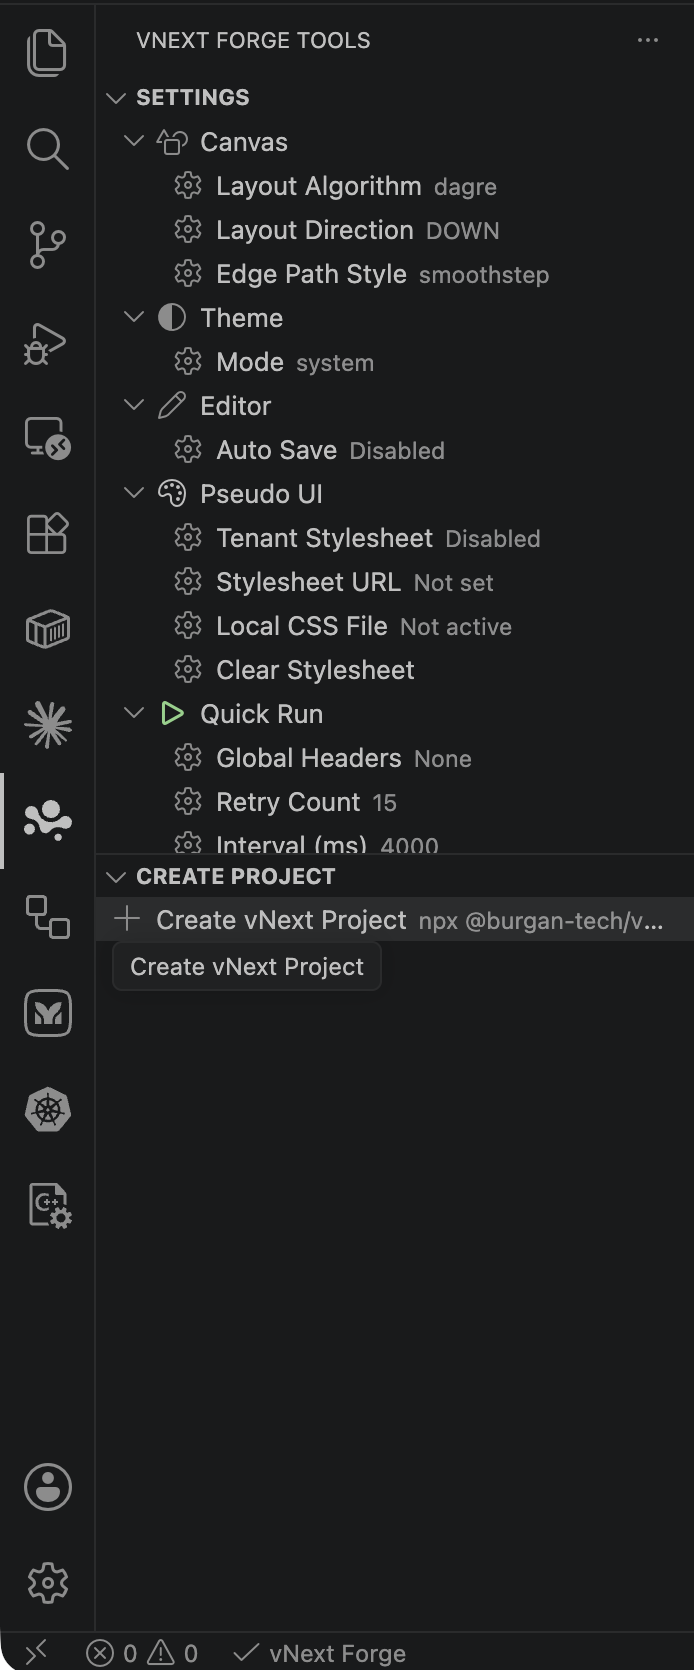
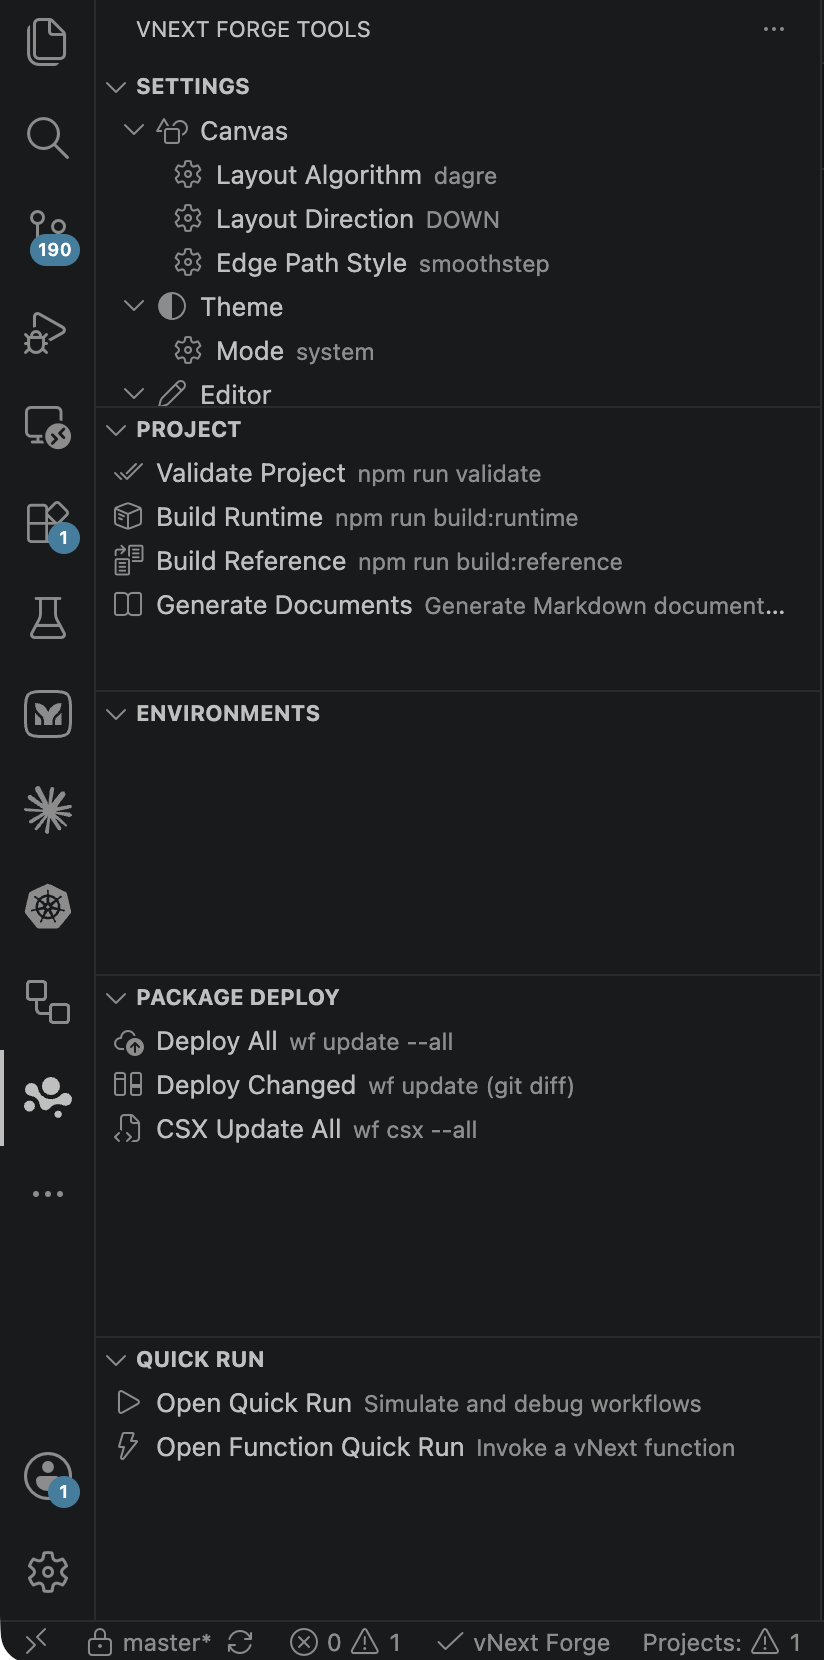
Once the project opens, the Forge Tools panel loads fully with Settings, Project, Environments, Package Deploy, Quick Run sections.
4. Workflow CLI Installation
On first run, Forge detects whether the Workflow CLI (wf) is installed on the machine. If it isn't, Forge offers the Install Workflow CLI action and runs the installation itself through the integrated terminal.
On corporate machines, global npm installs may be blocked by machine permissions. In that case, install the CLI manually:
npm install -g @burgan-tech/vnext-workflow-cli
Verify after installation:
wf --version
For EACCES-style permission errors and alternative installation methods, see the Workflow CLI documentation and the vnext-workflow-cli repo README. Refresh the sidebar in the Forge Tools panel after installing.
5. Add an Environment
To test components, you need to register a working environment with Forge. Click the Add Environment (+) button in the title of the Forge Tools → Environments panel.
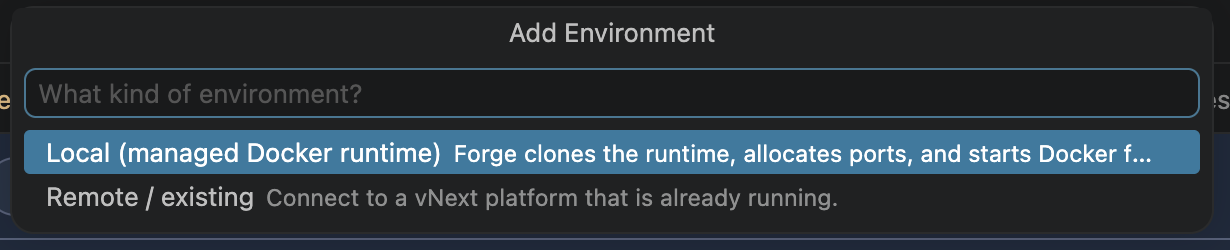
There are two environment types:
Local (Docker) Environment
Forge downloads vnext-runtime on your behalf, configures it for your domain, and brings it up with Docker Compose. After the environment is added, you manage it via the actions on the environment row:
| Action | Description |
|---|---|
| Start / Stop / Restart Local Runtime | Starts/stops the domain containers |
| Check Environment Health | Queries the runtime's health/check endpoint |
| Show Local Runtime Logs | Opens container logs in VS Code |
| Reveal Ports | Shows the ports assigned to the domain |
| Update Runtime | Updates the runtime version |
| Register with Workflow CLI | Registers the domain with the CLI (required for deploys) |
| Start / Stop Infrastructure | Manages the shared infrastructure (PostgreSQL, Redis, Vault, Dapr) |
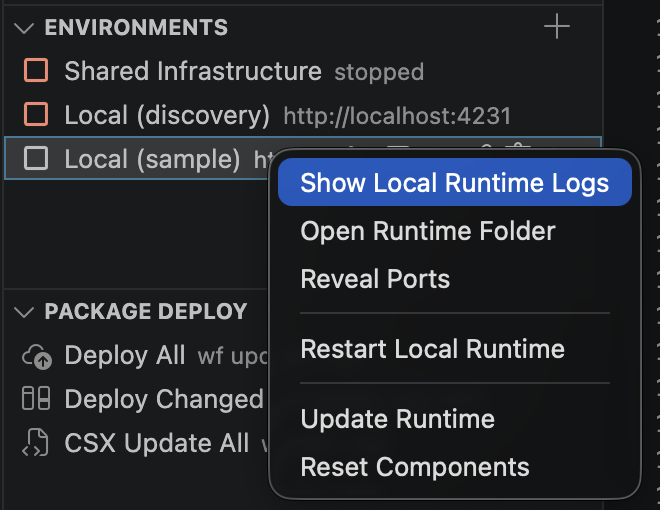
If the local runtime's domain isn't registered with the CLI, Forge flags it on the environment row and suggests the Register with Workflow CLI action. Deploy (publish) operations won't work without this registration.
Remote Environment
To connect to an already-running runtime (such as a test/staging environment), choose Remote / existing and enter the runtime's base URL. Forge verifies reachability with a health check; Quick Run and Instance Monitor operate against this environment.

You can define multiple environments and switch between them with Set Active Environment.
6. Start Developing Flows
The environment is ready — you can now build workflows. Two approaches:
With AI: Invoke the relevant skill for an end-to-end design. For example, to design a new process:
claude /vnext-ai-toolkit:vnext-design-process "Account opening process"
or use the workflow-scaffold skill inside Claude Code to scaffold a single workflow:
> Create a new approval workflow with draft, manager-review, and completed states
The AI plans the state/transition graph, generates the workflow JSON + .csx mappings + .http test files, and validates with npm run validate.
With the Forge Designer: Right-click the Workflows/ folder in Explorer and pick Forge: Workflow Create to work in the visual designer. See the Forge Usage Guide for details.
Next Steps
- Tutorial: First Workflow — build a simple approval flow step by step.
- Forge Usage Guide — Forge Tools, component designers, publish, and the CLI relationship.
- AI-Assisted Development — the full agent pipeline and skills.
Troubleshooting — Which Repo?
| Problem | Where to look |
|---|---|
| Forge panels/designer issues | vnext-forge |
wf command errors, deploy/publish issues | vnext-workflow-cli |
| Runtime containers, port conflicts, infrastructure | vnext-runtime |
| AI agent/skill issues | vnext-ai-toolkit |
If you need a manual (Forge-less) runtime setup, the archived Local Development and Multi-Domain Setup guides remain available as references.