Forge Usage Guide
This guide covers day-to-day use of the vNext Forge VS Code extension: the Forge Tools panels, Explorer context menus, the visual designer for each component type, and how publishing relates to the Workflow CLI.
For installation and creating your first project, see the Development Environment Setup (Forge) guide.
Forge Tools Panels
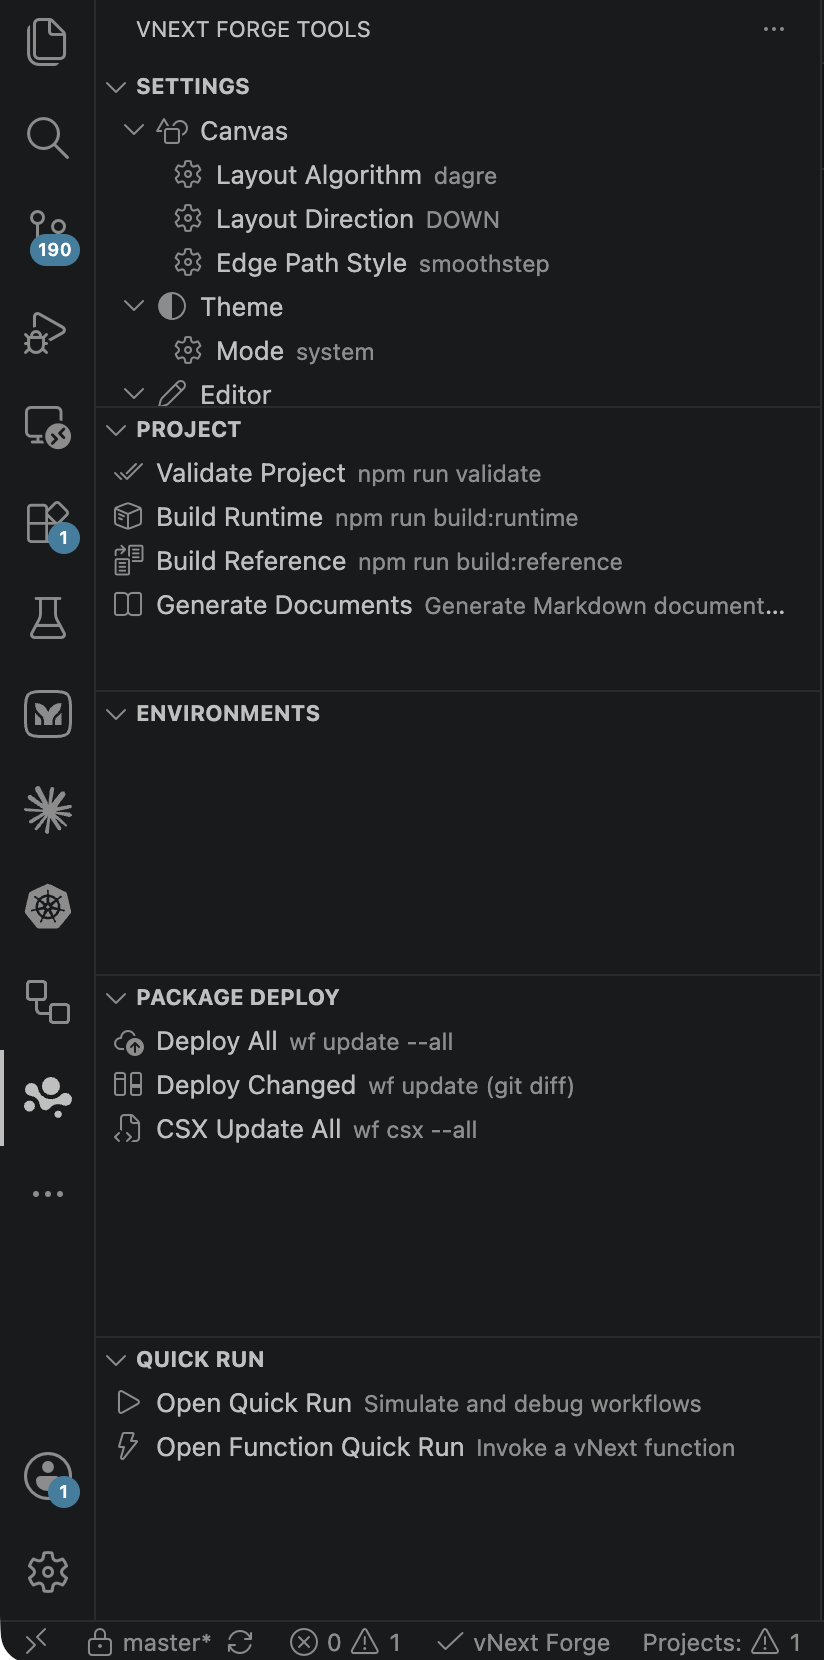
Clicking the vNext Forge Tools icon in the Activity Bar reveals five panels (when no project is open, only Settings and Create Project are visible):
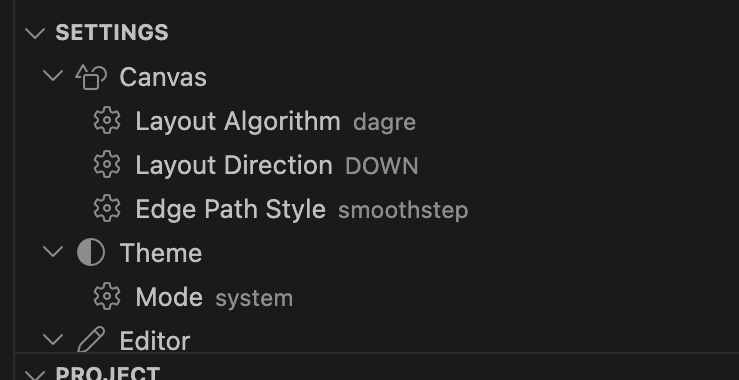
Settings
Manages workspace and global Forge settings. Use the pencil icon on each setting row (Change Setting) to modify a value. Panel title actions:
| Action | Description |
|---|---|
| Share Config With Workspace | Writes your personal settings into the workspace config so the whole team works with the same settings |
| Export Forge Tools Config | Exports settings to a file |
| Import Forge Tools Config | Imports a previously exported config |
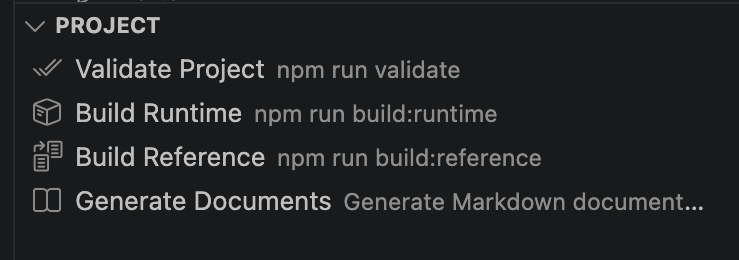
Project
Contains build and validation actions for the active domain project:
| Action | Description |
|---|---|
| Validate Project | npm run validate — validates all components against their schemas |
| Build Runtime | Produces the runtime package (deployable output) |
| Build Reference | Produces the reference package (consumed by other domains) |
| Generate Documents | Generates documentation from the components |
Environments
The panel where local and remote environments are added, started, and stopped. The full walkthrough is in the Development Environment Setup guide. In short:
- Local (Docker) — Forge installs and manages
vnext-runtime: Start/Stop/Restart, Health Check, Logs, Reveal Ports, Update Runtime, Register with Workflow CLI, Reset Components. - Remote / existing — connects to a running runtime via its base URL.
- Infrastructure row — manages the shared infrastructure (PostgreSQL, Redis, Vault, Dapr): Start/Stop/Restart Infrastructure, Show Infrastructure Logs/Status, Stop All Domains, Stop All Domains and Infrastructure.
Package Deploy
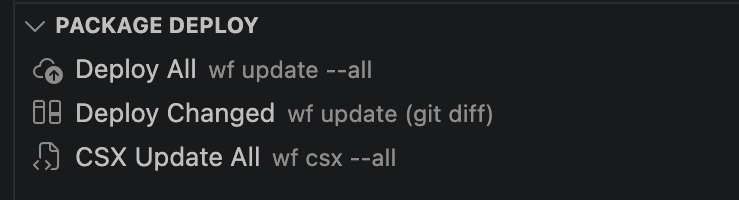
Deploys component changes in the domain to the active environment. This panel is the visual counterpart of the Workflow CLI commands — each action maps to a wf command:
| Action | CLI equivalent | Description |
|---|---|---|
| Deploy All | wf update --all | Deploys all components |
| Deploy Changed | wf update | Deploys only changed components |
| CSX Update All | wf csx --all | Updates all .csx mappings |
Quick Run
A tool for testing workflows against the active environment in real time: starting new instances, triggering transitions, instance details (View, Data, History, Correlations), global headers, and filtering.
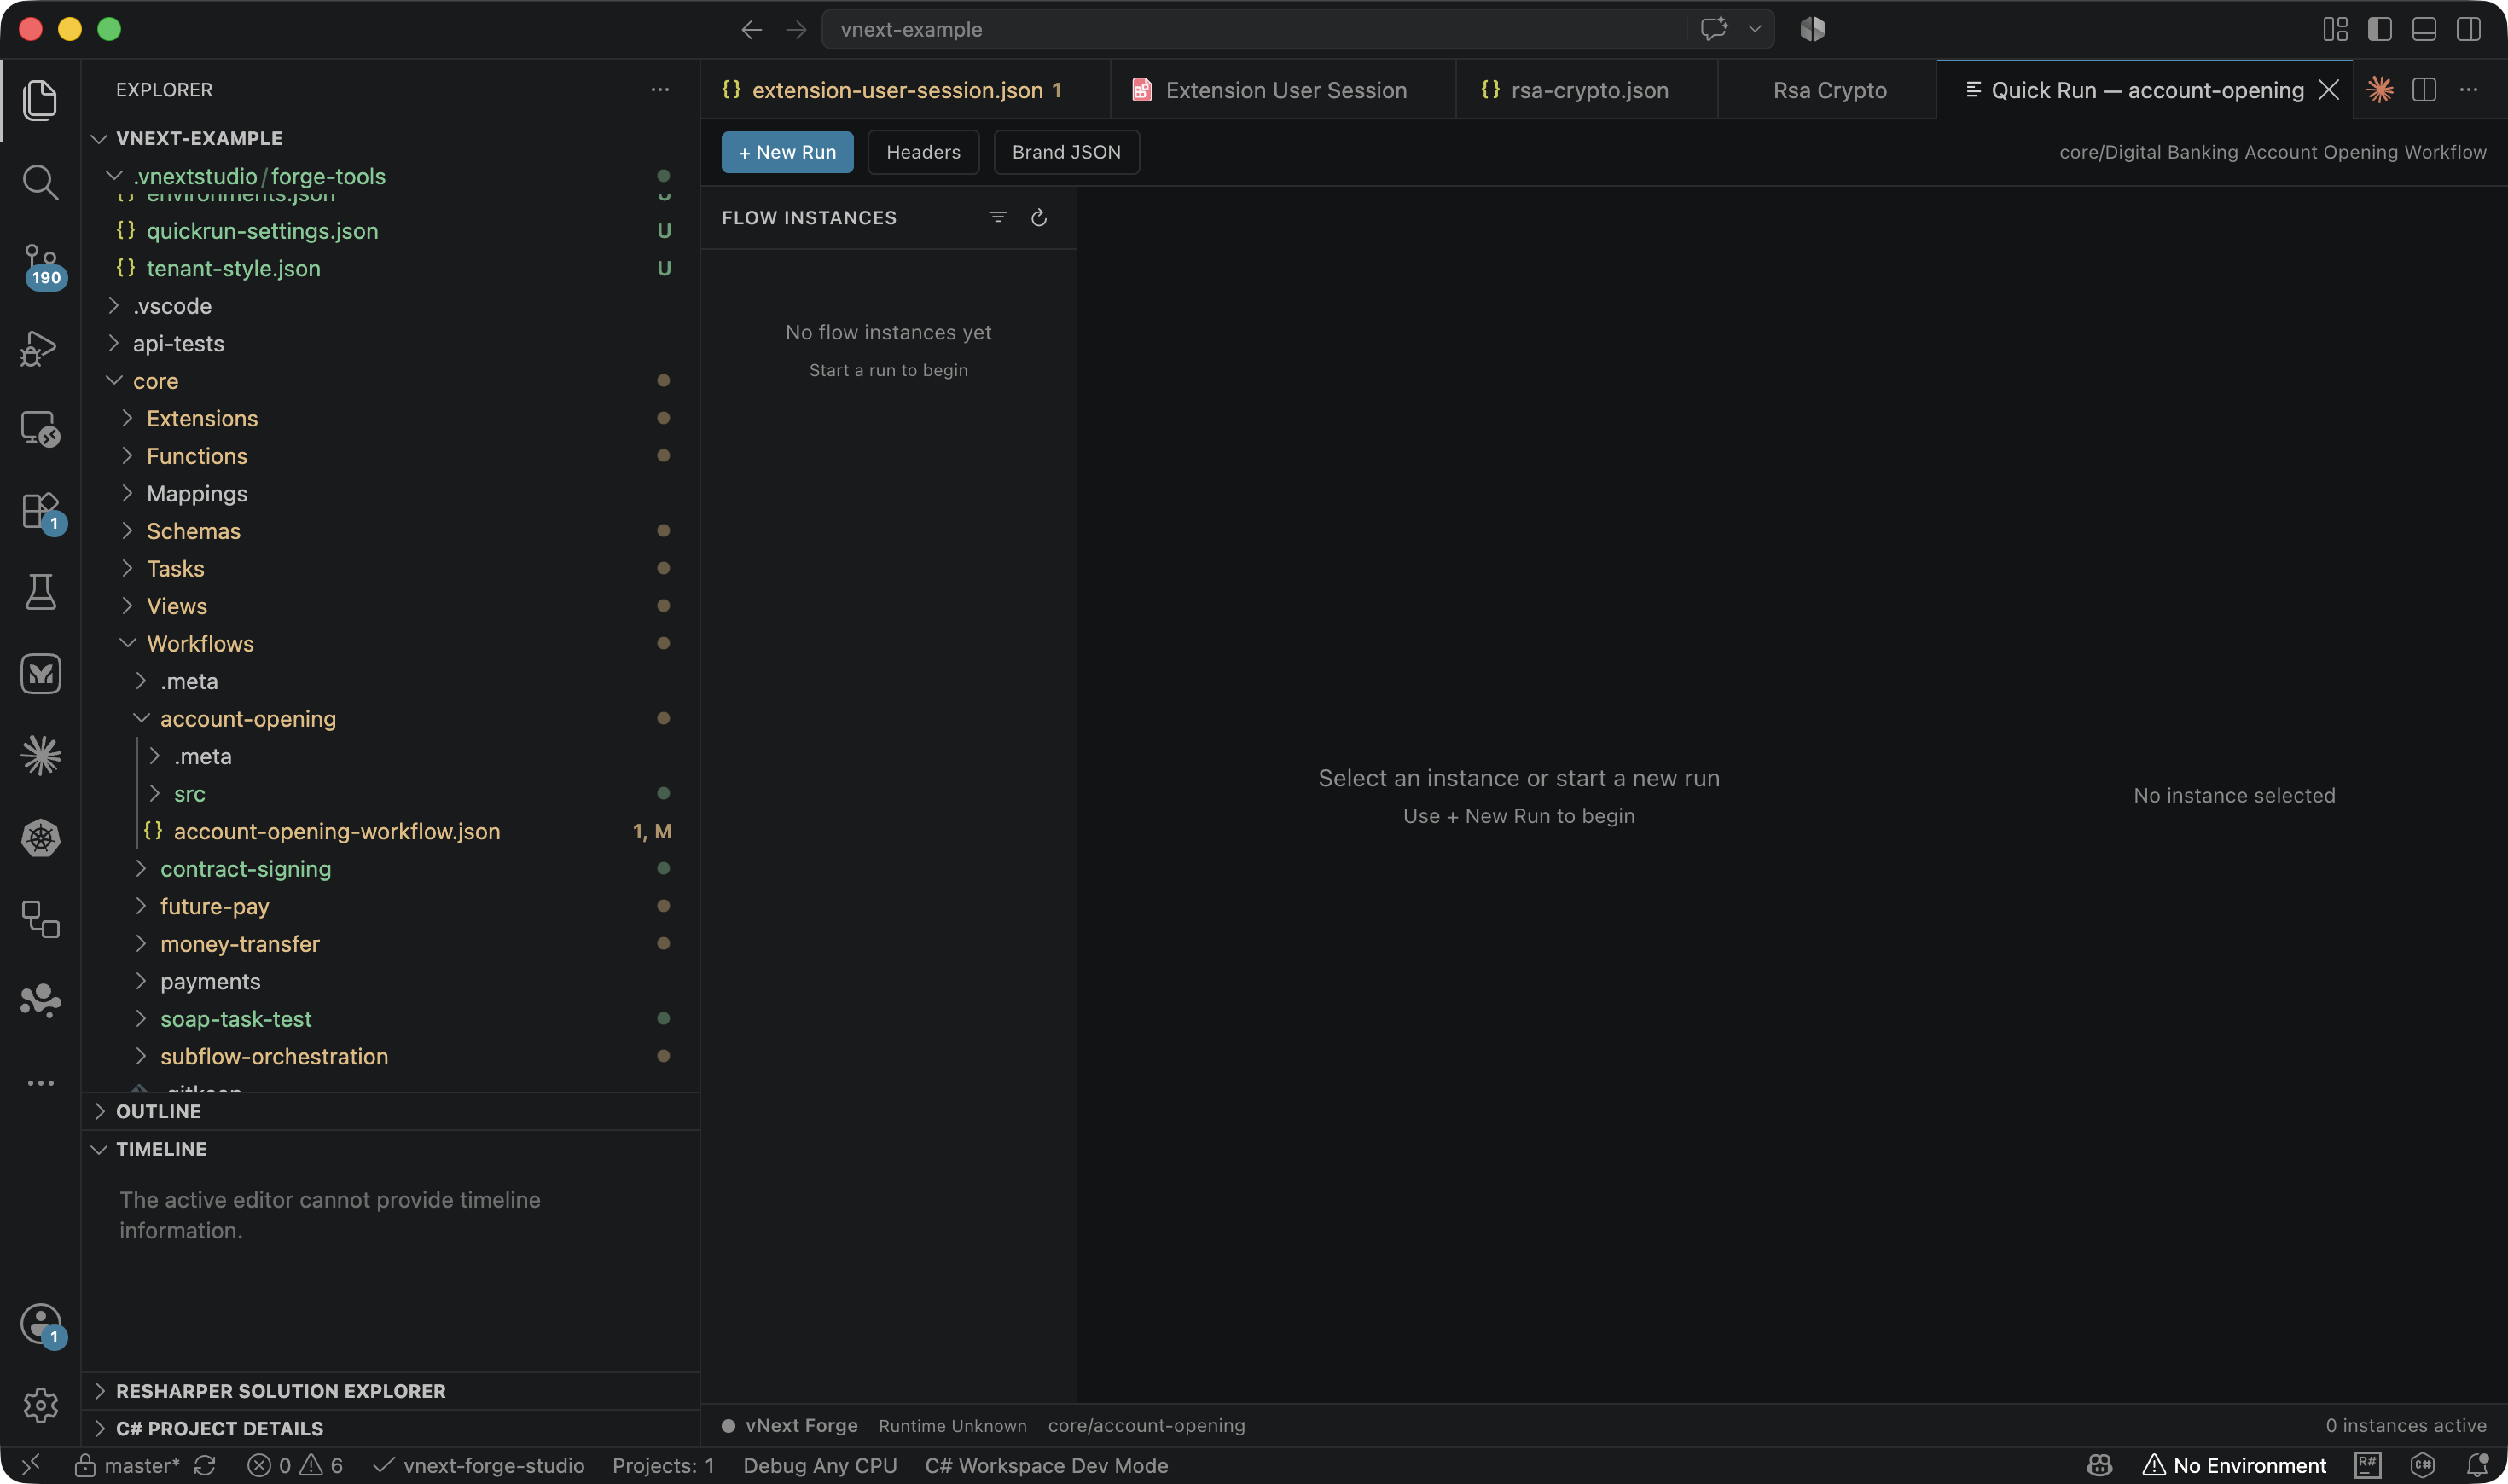
There is also a Function Quick Run for functions — right-click a JSON file under Functions/ and choose Open Function Quick Run.
See the Flow Quick Runner page for the annotated main screen, starting instances, firing transitions, State View rendering, the Data/History/Correlations/Raw tabs, and the Function Quick Runner.
Explorer Context Menus
Forge adds actions to the Explorer right-click menu based on the file/folder type.
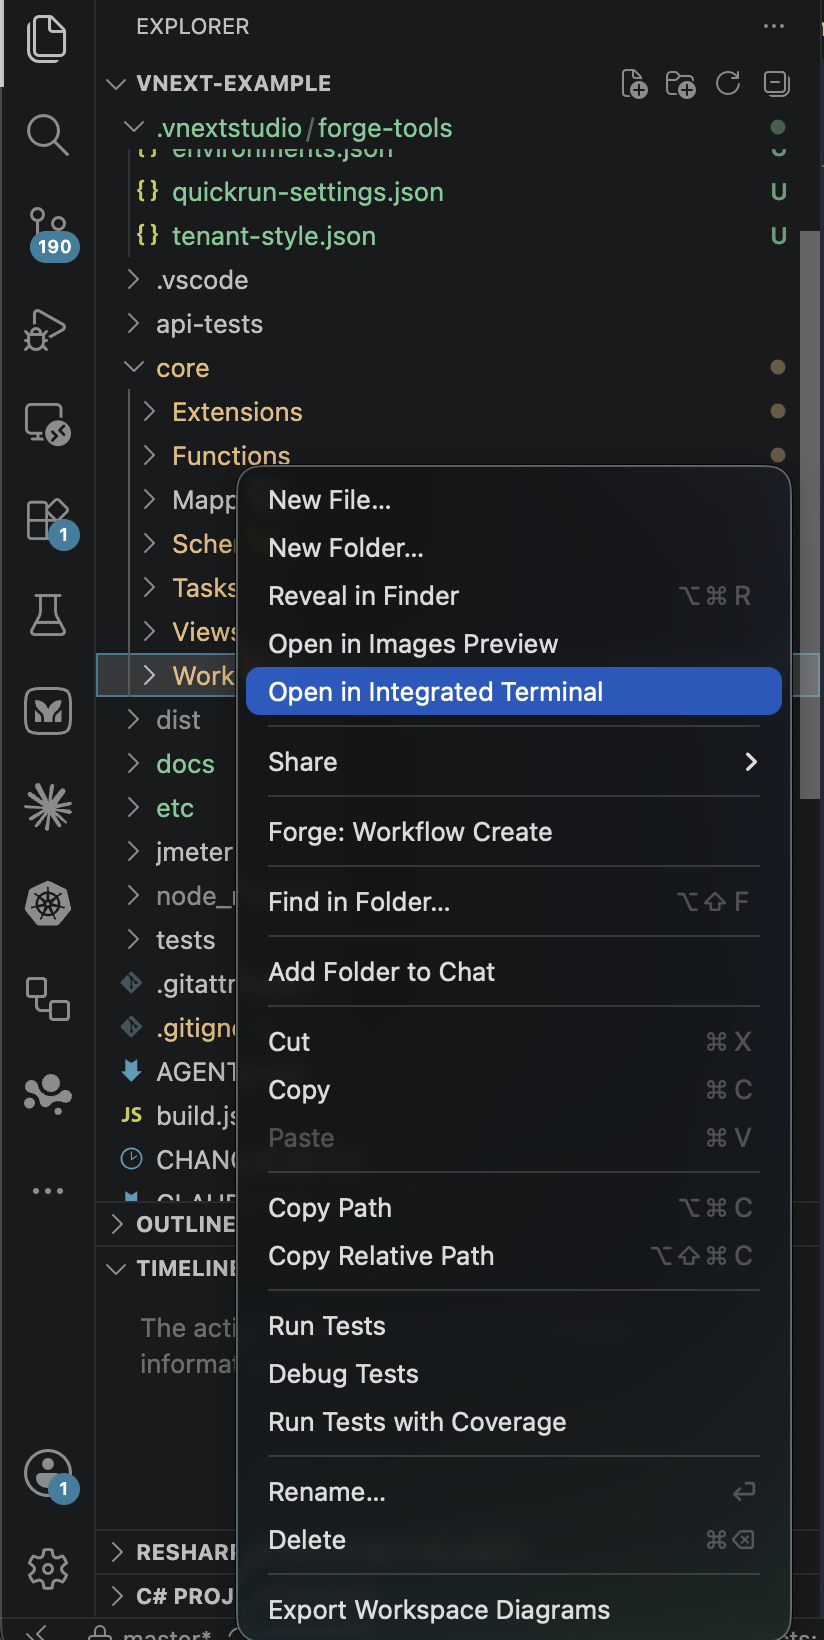
On component folders (right-click → Create)
Each component folder shows the Create action for its own type:
| Folder | Menu action |
|---|---|
Workflows/ | Forge: Workflow Create |
Tasks/ | Forge: Task Create |
Schemas/ | Forge: Schema Create |
Views/ | Forge: View Create |
Functions/ | Forge: Function Create |
Extensions/ | Forge: Extension Create |
Mappings/ | Forge: Mapping Create |
On component JSON files
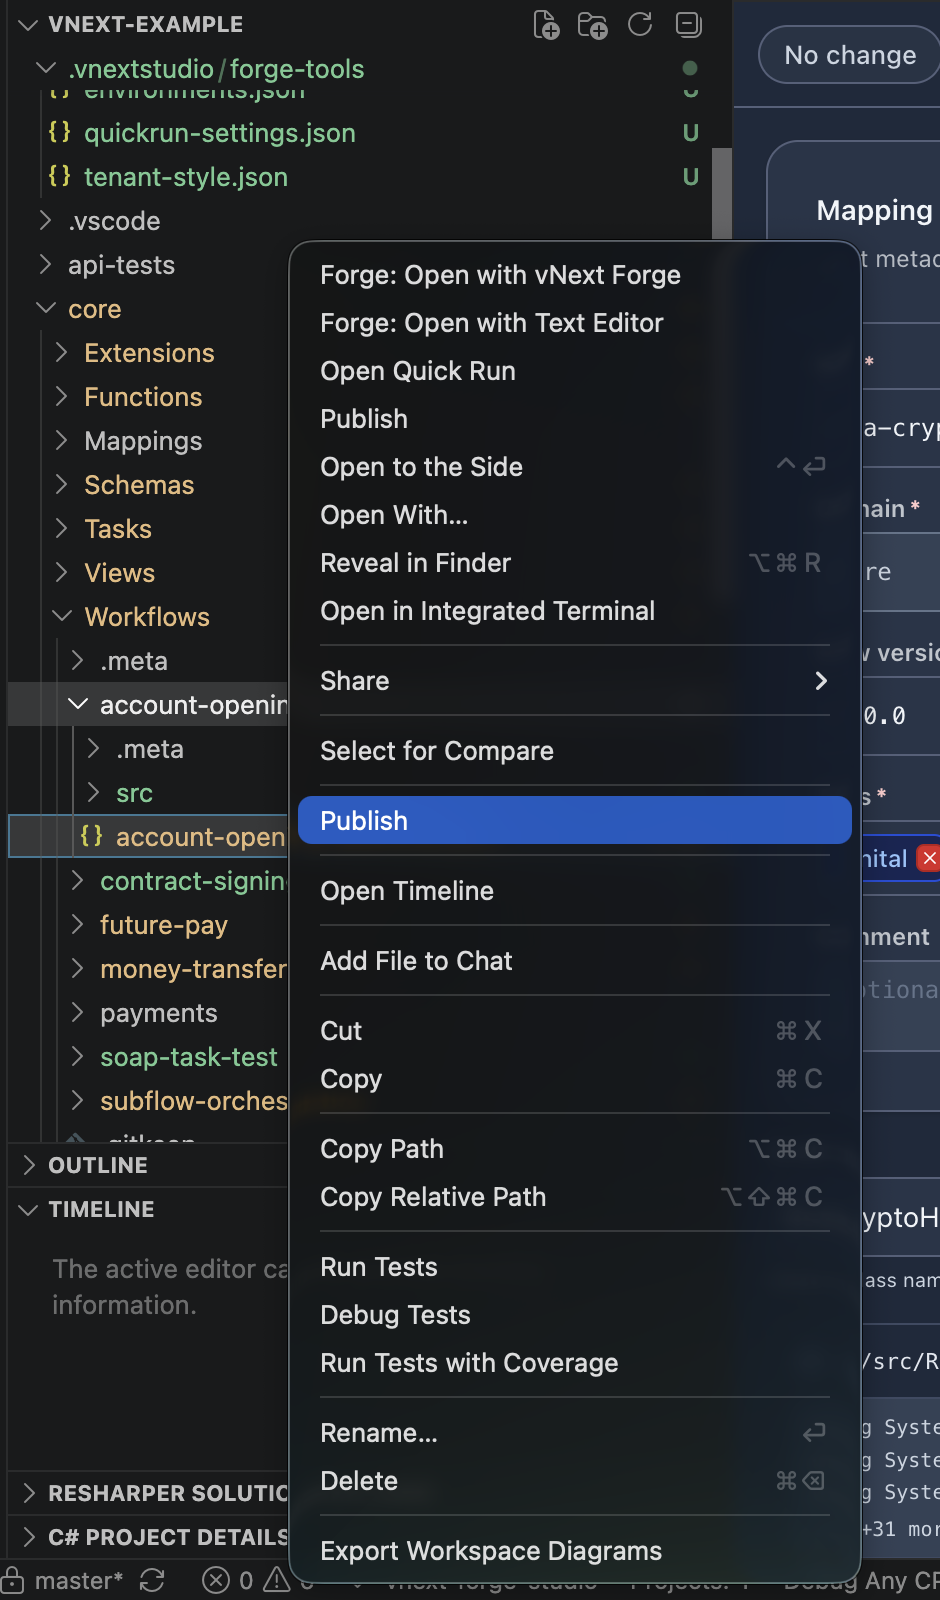
When you right-click a component .json file:
| Action | Description |
|---|---|
| Forge: Open with vNext Forge | Opens the file in the visual designer |
| Forge: Open with Text Editor | Opens it as raw JSON |
| Open Quick Run | (Workflows) Opens the workflow in Quick Run |
| Open Function Quick Run | (Functions) Opens the function in the test panel |
| Publish | Deploys the component to the active environment (see below) |
On .csx files
Right-click a .csx mapping file → Sync Current CSX to JSON: writes the script content into the linked component JSON's code field (Base64). From the Command Palette you can toggle Enable/Disable CSX → JSON Auto-Sync; Sync All CSX Files to JSON synchronizes everything in one go.
Component Designers
Forge ships a dedicated visual editor for each component type. Two ways to open the designer: double-click the file (Forge is the default editor) or right-click → Forge: Open with vNext Forge.
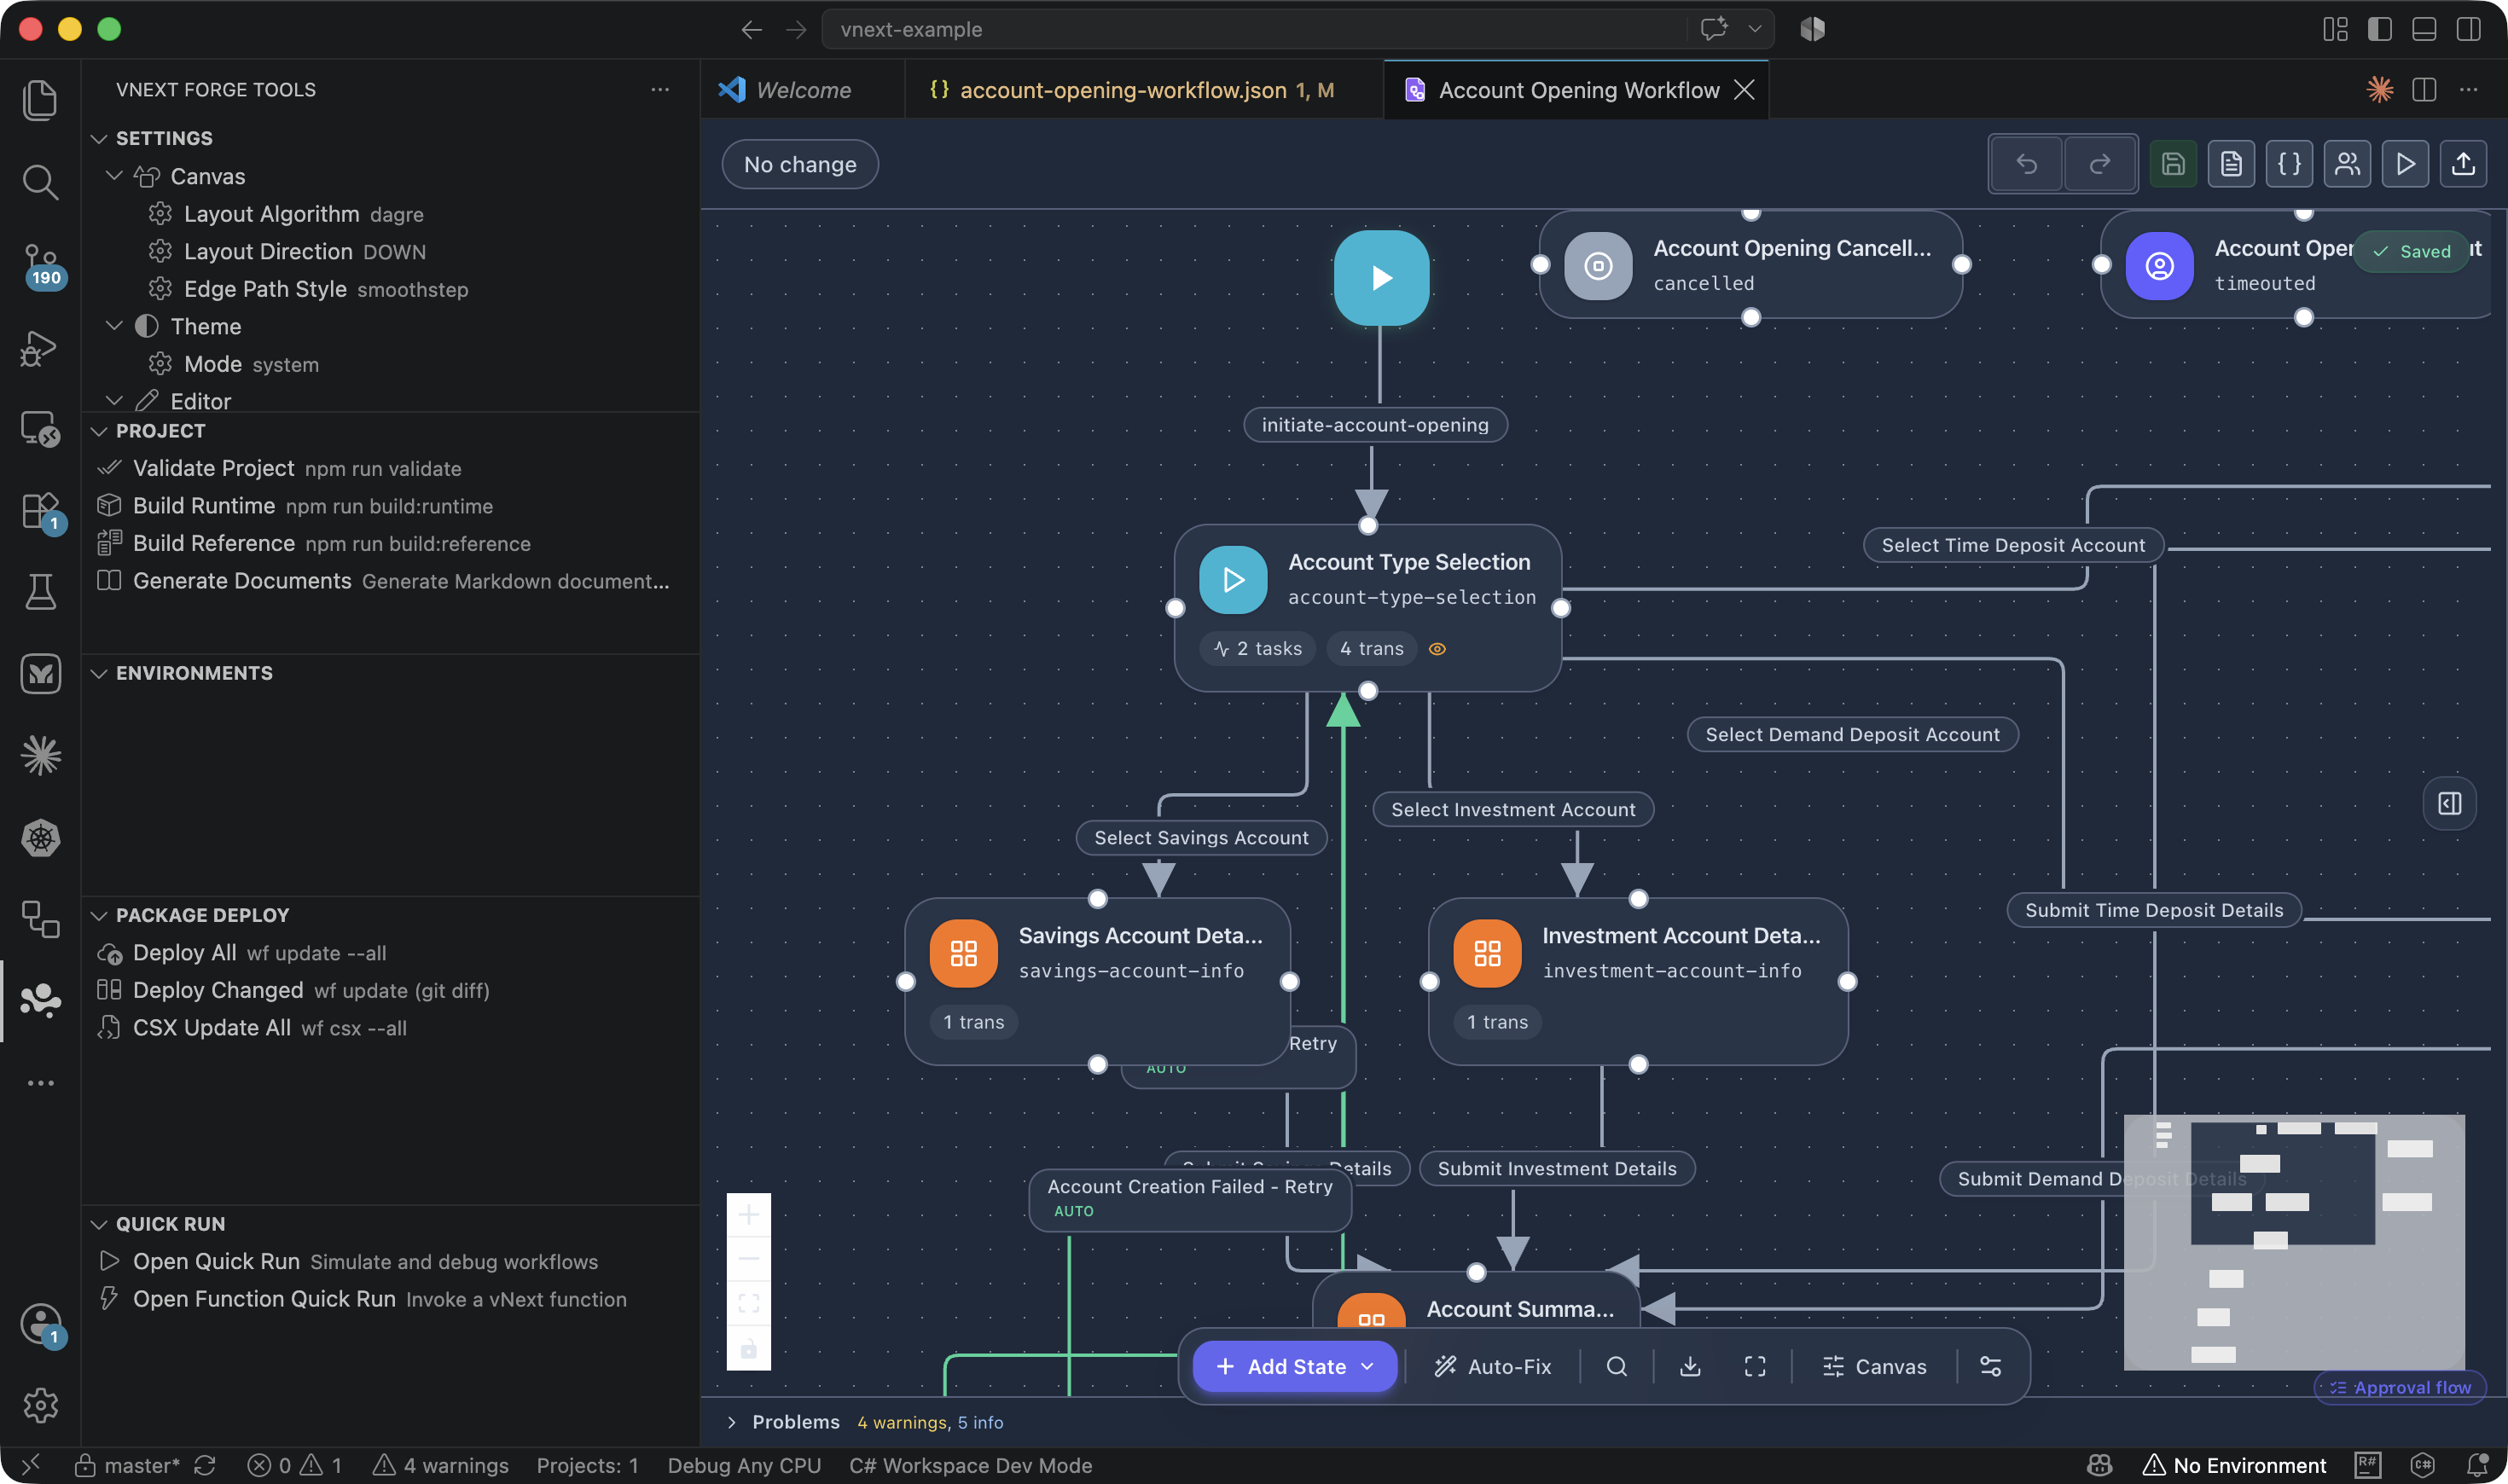
Workflow Designer
A state-machine-based visual canvas: adding/editing states, transition connections, auto-layout, search, and the property sidebar (General, Tasks, Transitions, Error Boundary).
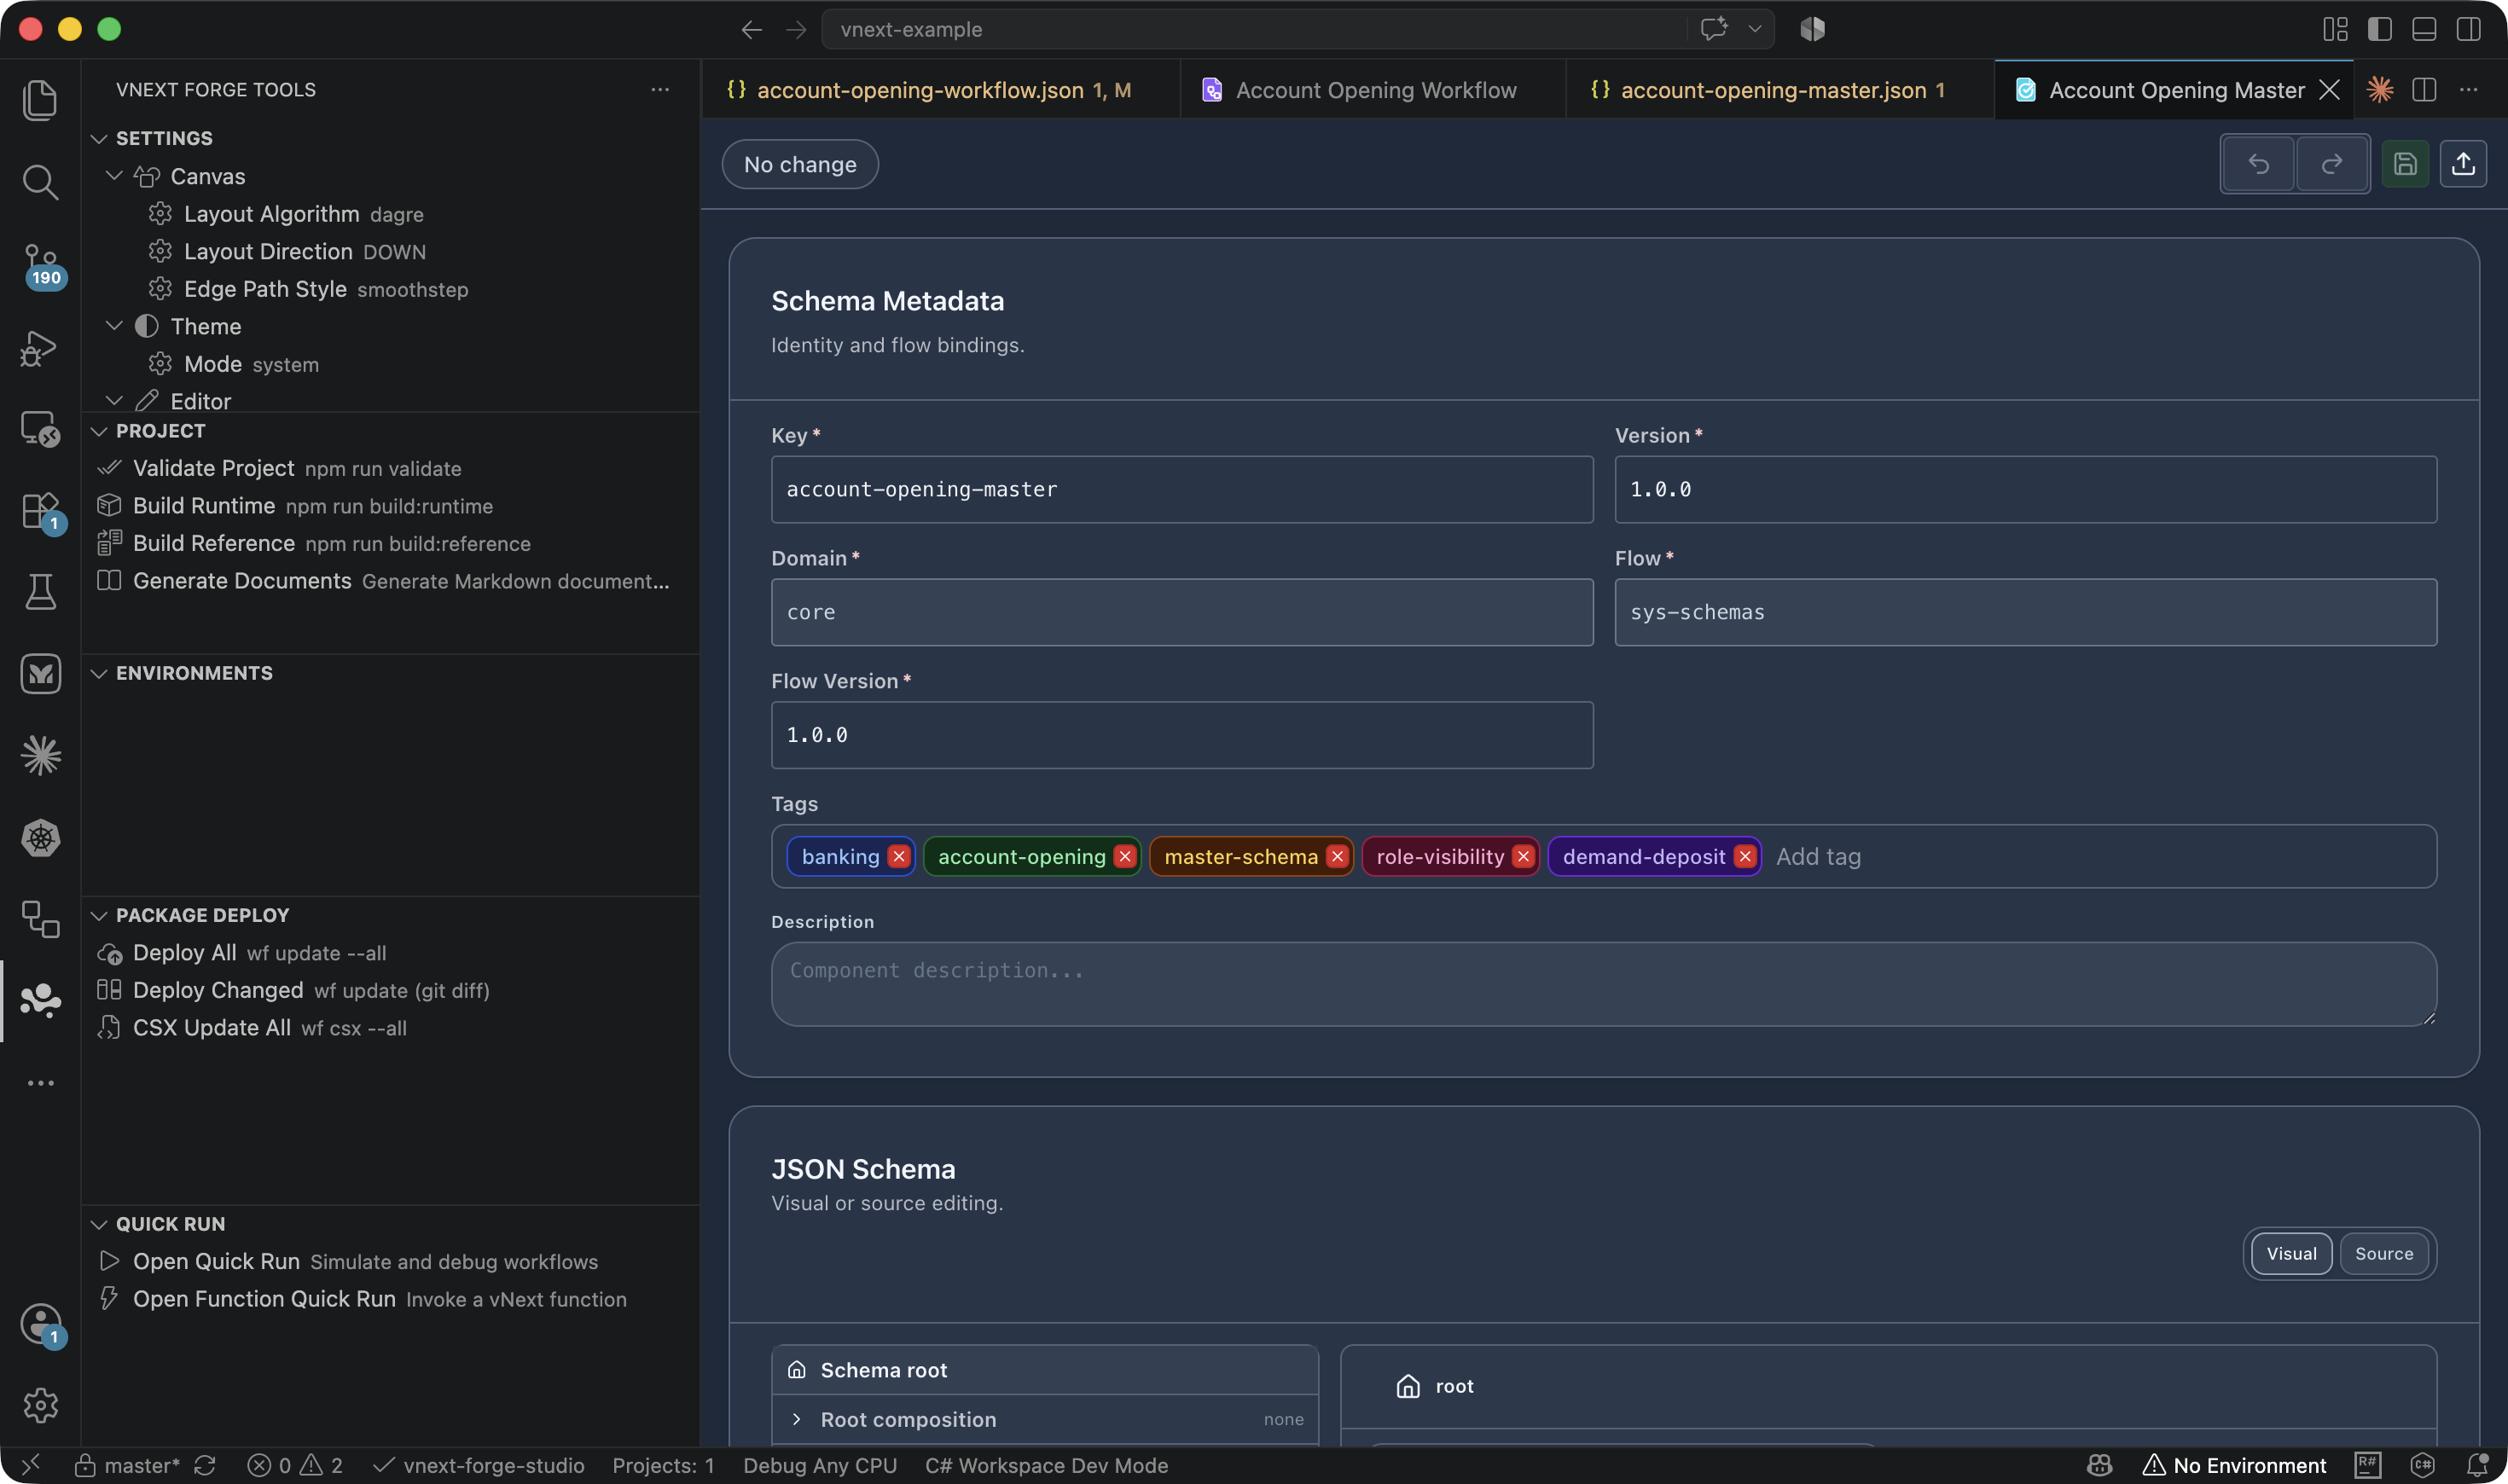
Schema Designer
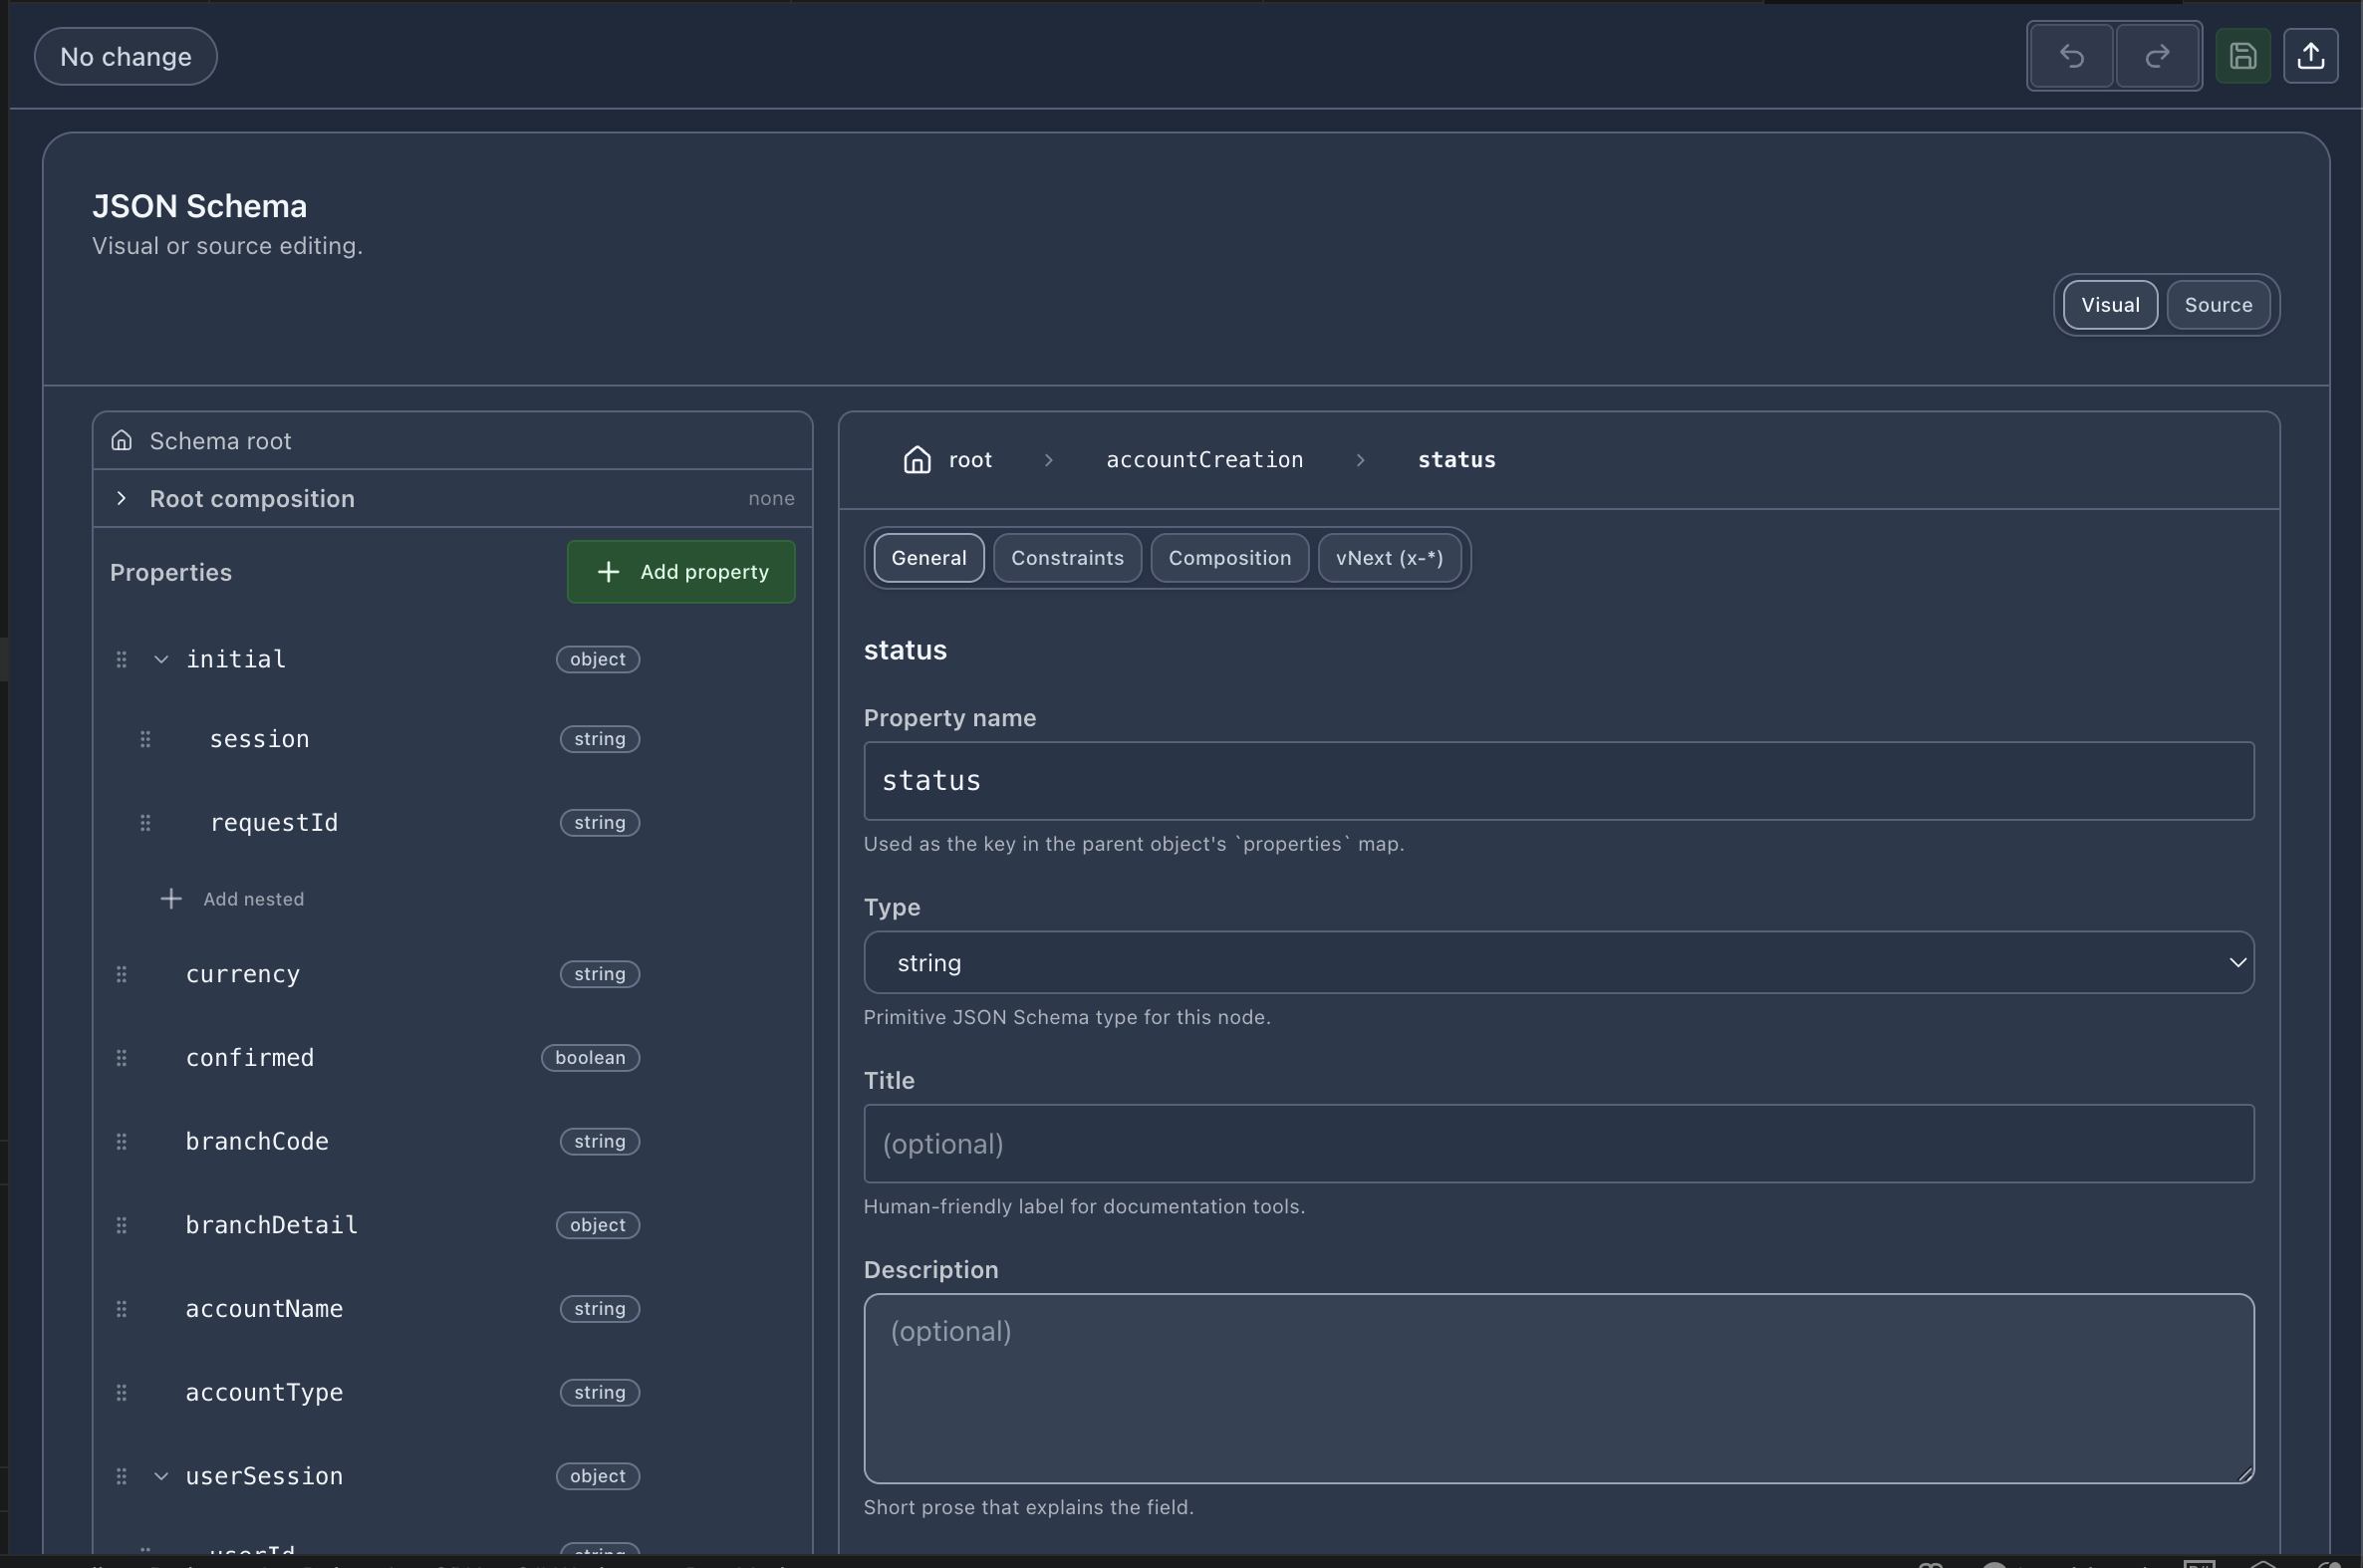
Designs JSON Schemas visually: adding fields, type/validation rules, localization (x-labels), role-based access (x-roles), and query metadata.
The field tree with nested objects, type badges, and Add nested for sub-fields:
View Designer
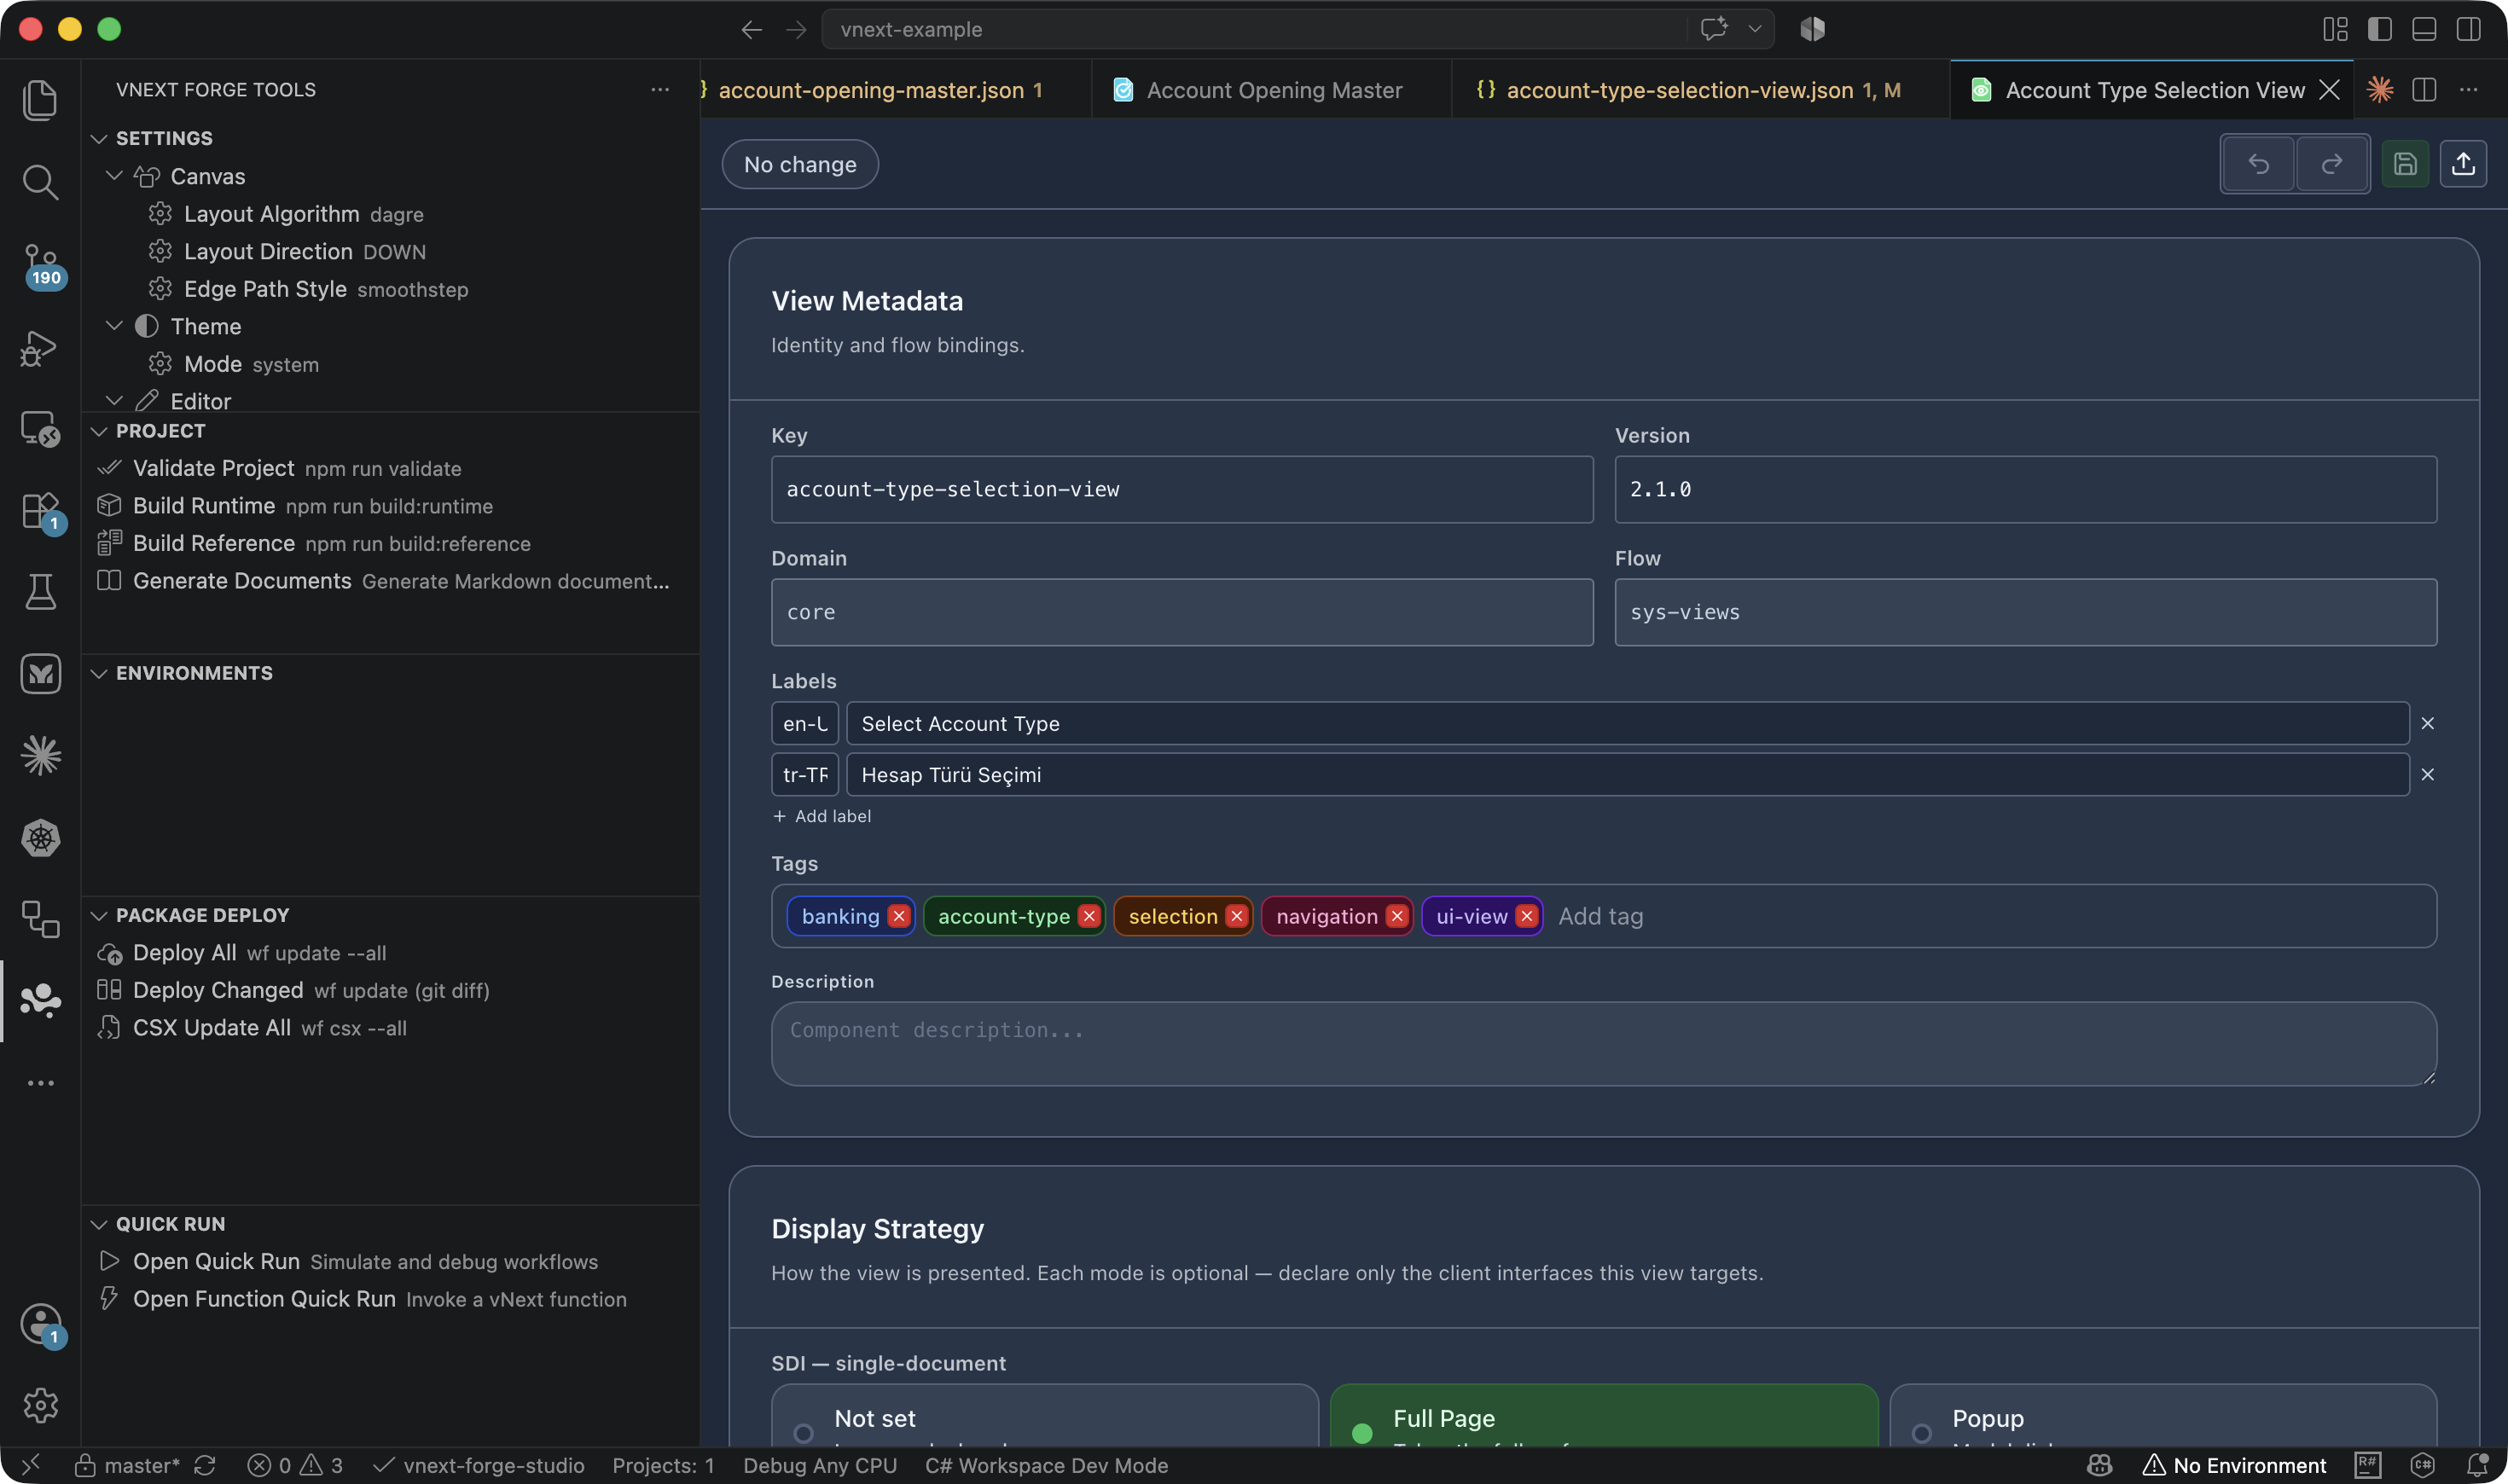
Edits view components: renderer selection (pseudo-ui recommended), the view tree, and schema bindings. See the View Concept docs for the Pseudo-UI vocabulary.
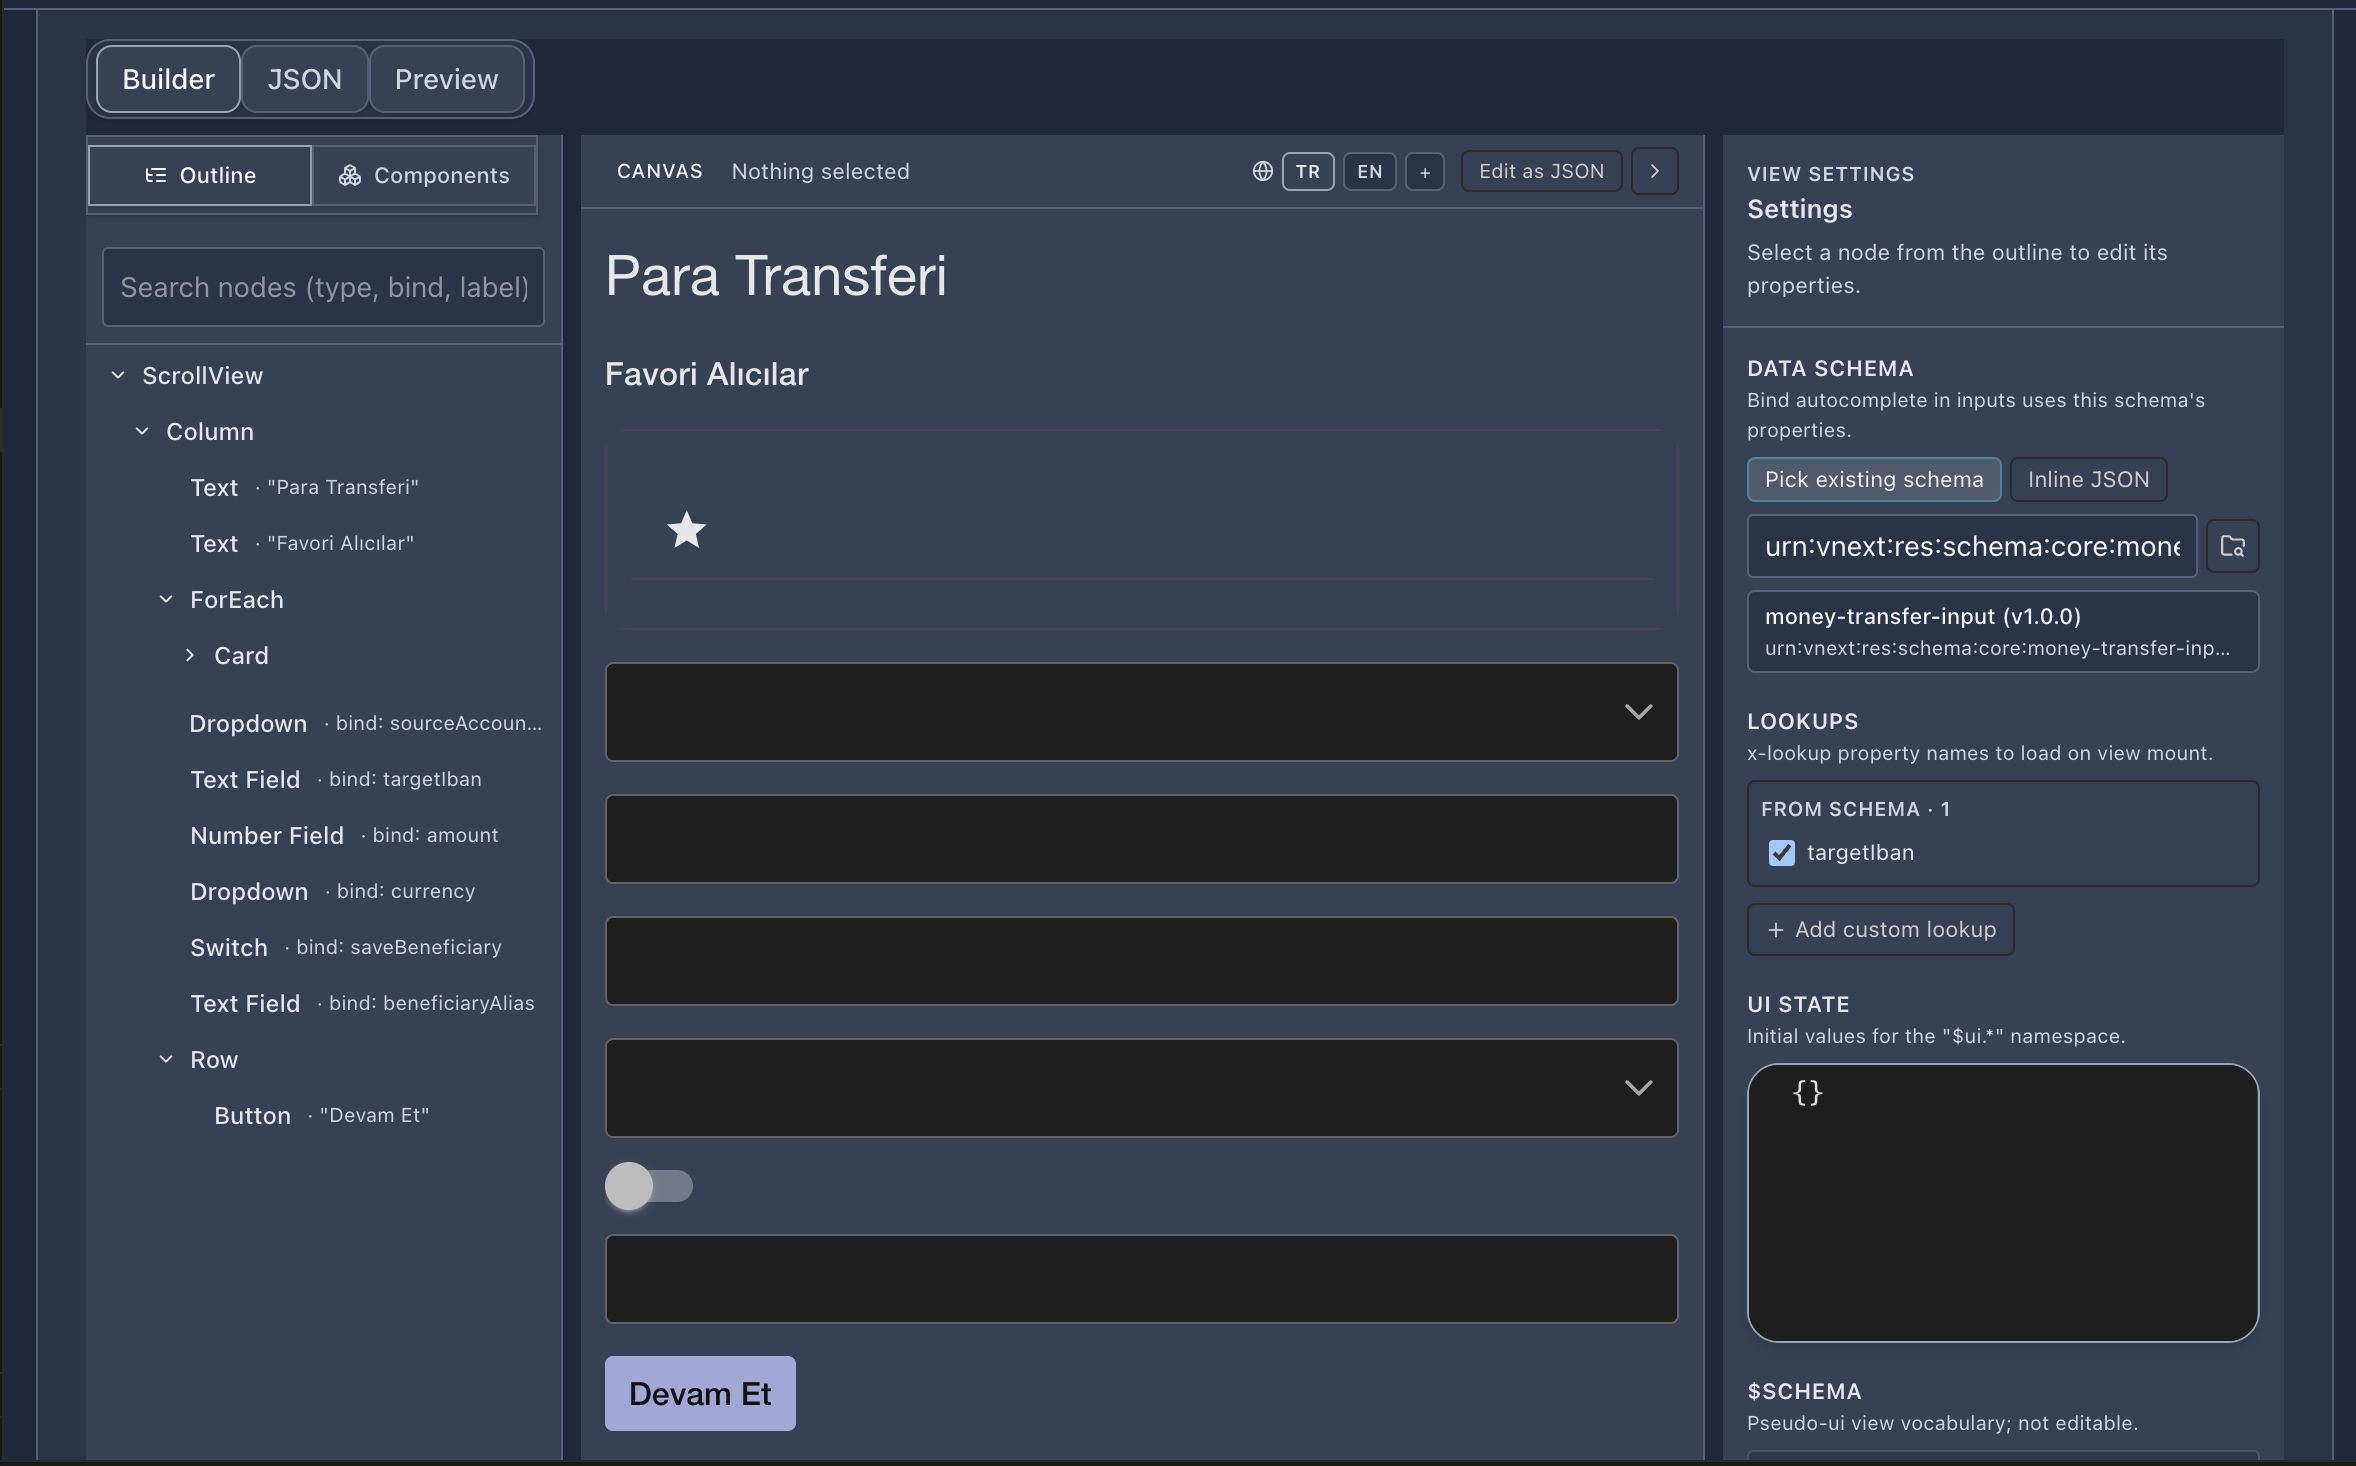
Below the metadata a three-panel layout opens: the Outline/Components tree on the left, the live Canvas preview in the middle, and View Settings on the right (Data Schema binding, Lookups, UI State, $schema):
Task Editor
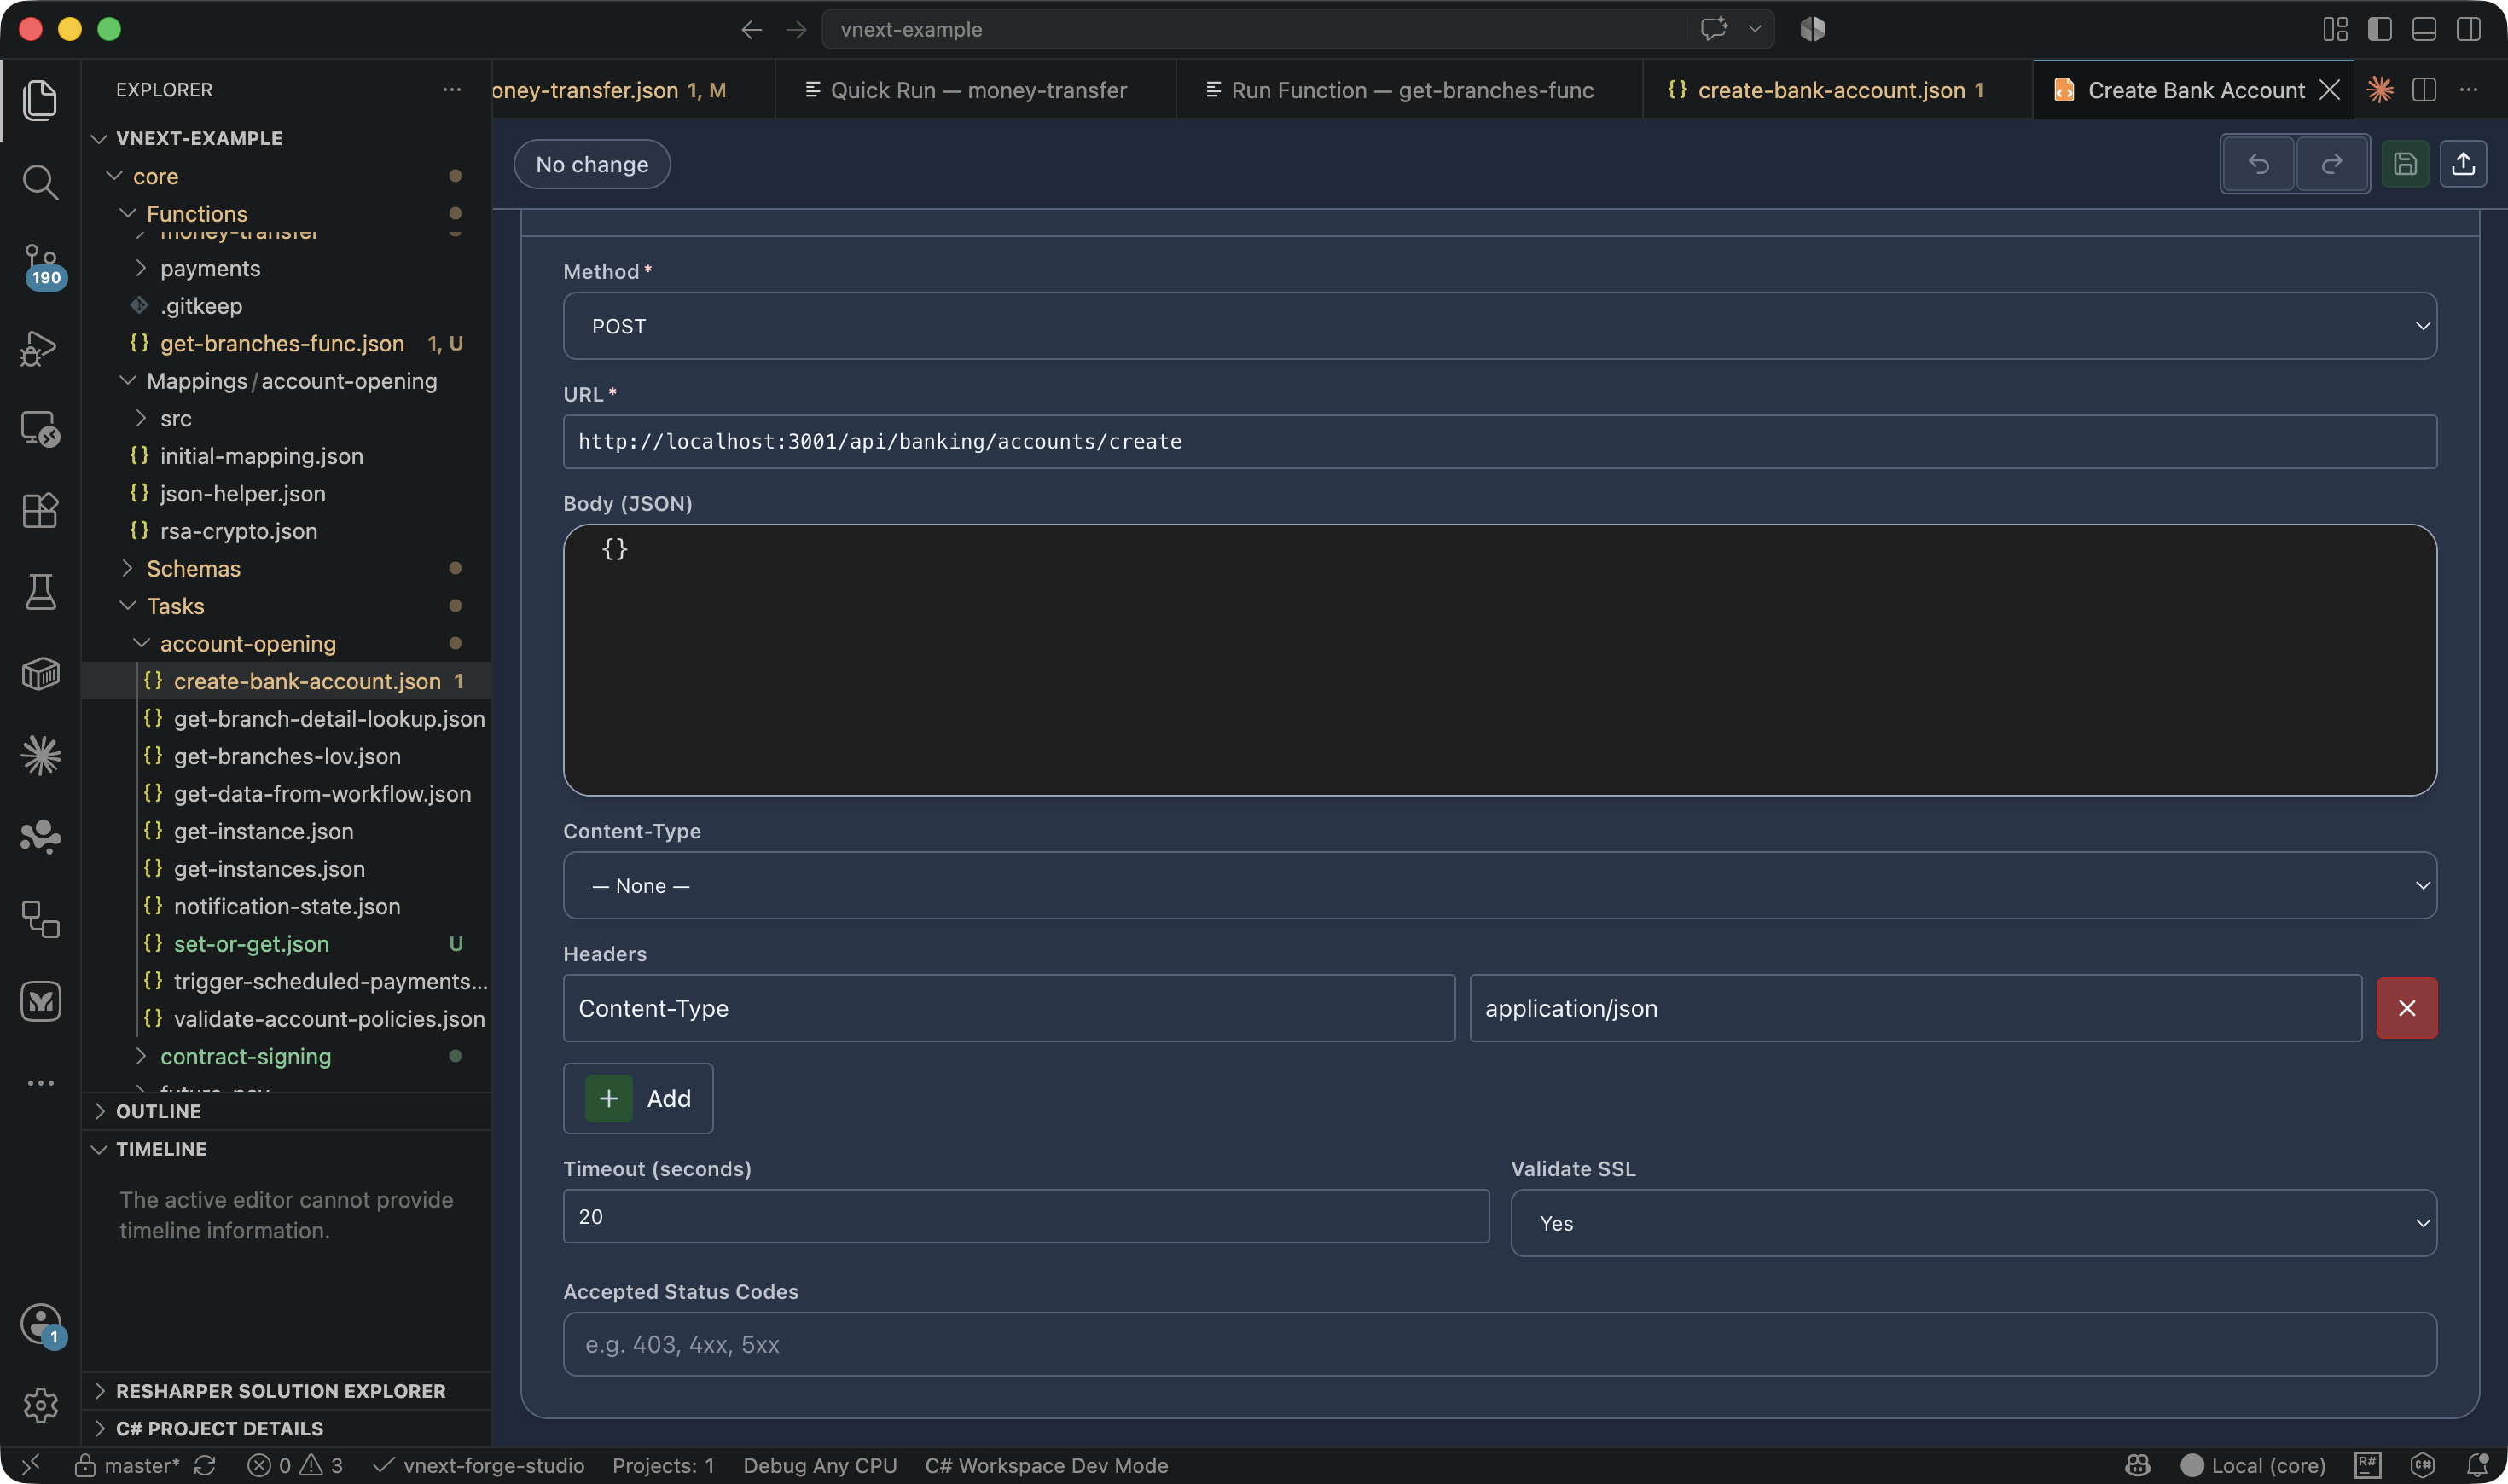
Form-based editing of the task type (HTTP, Script, Dapr, Notification, …) and its type-specific config fields; manages mapping bindings.
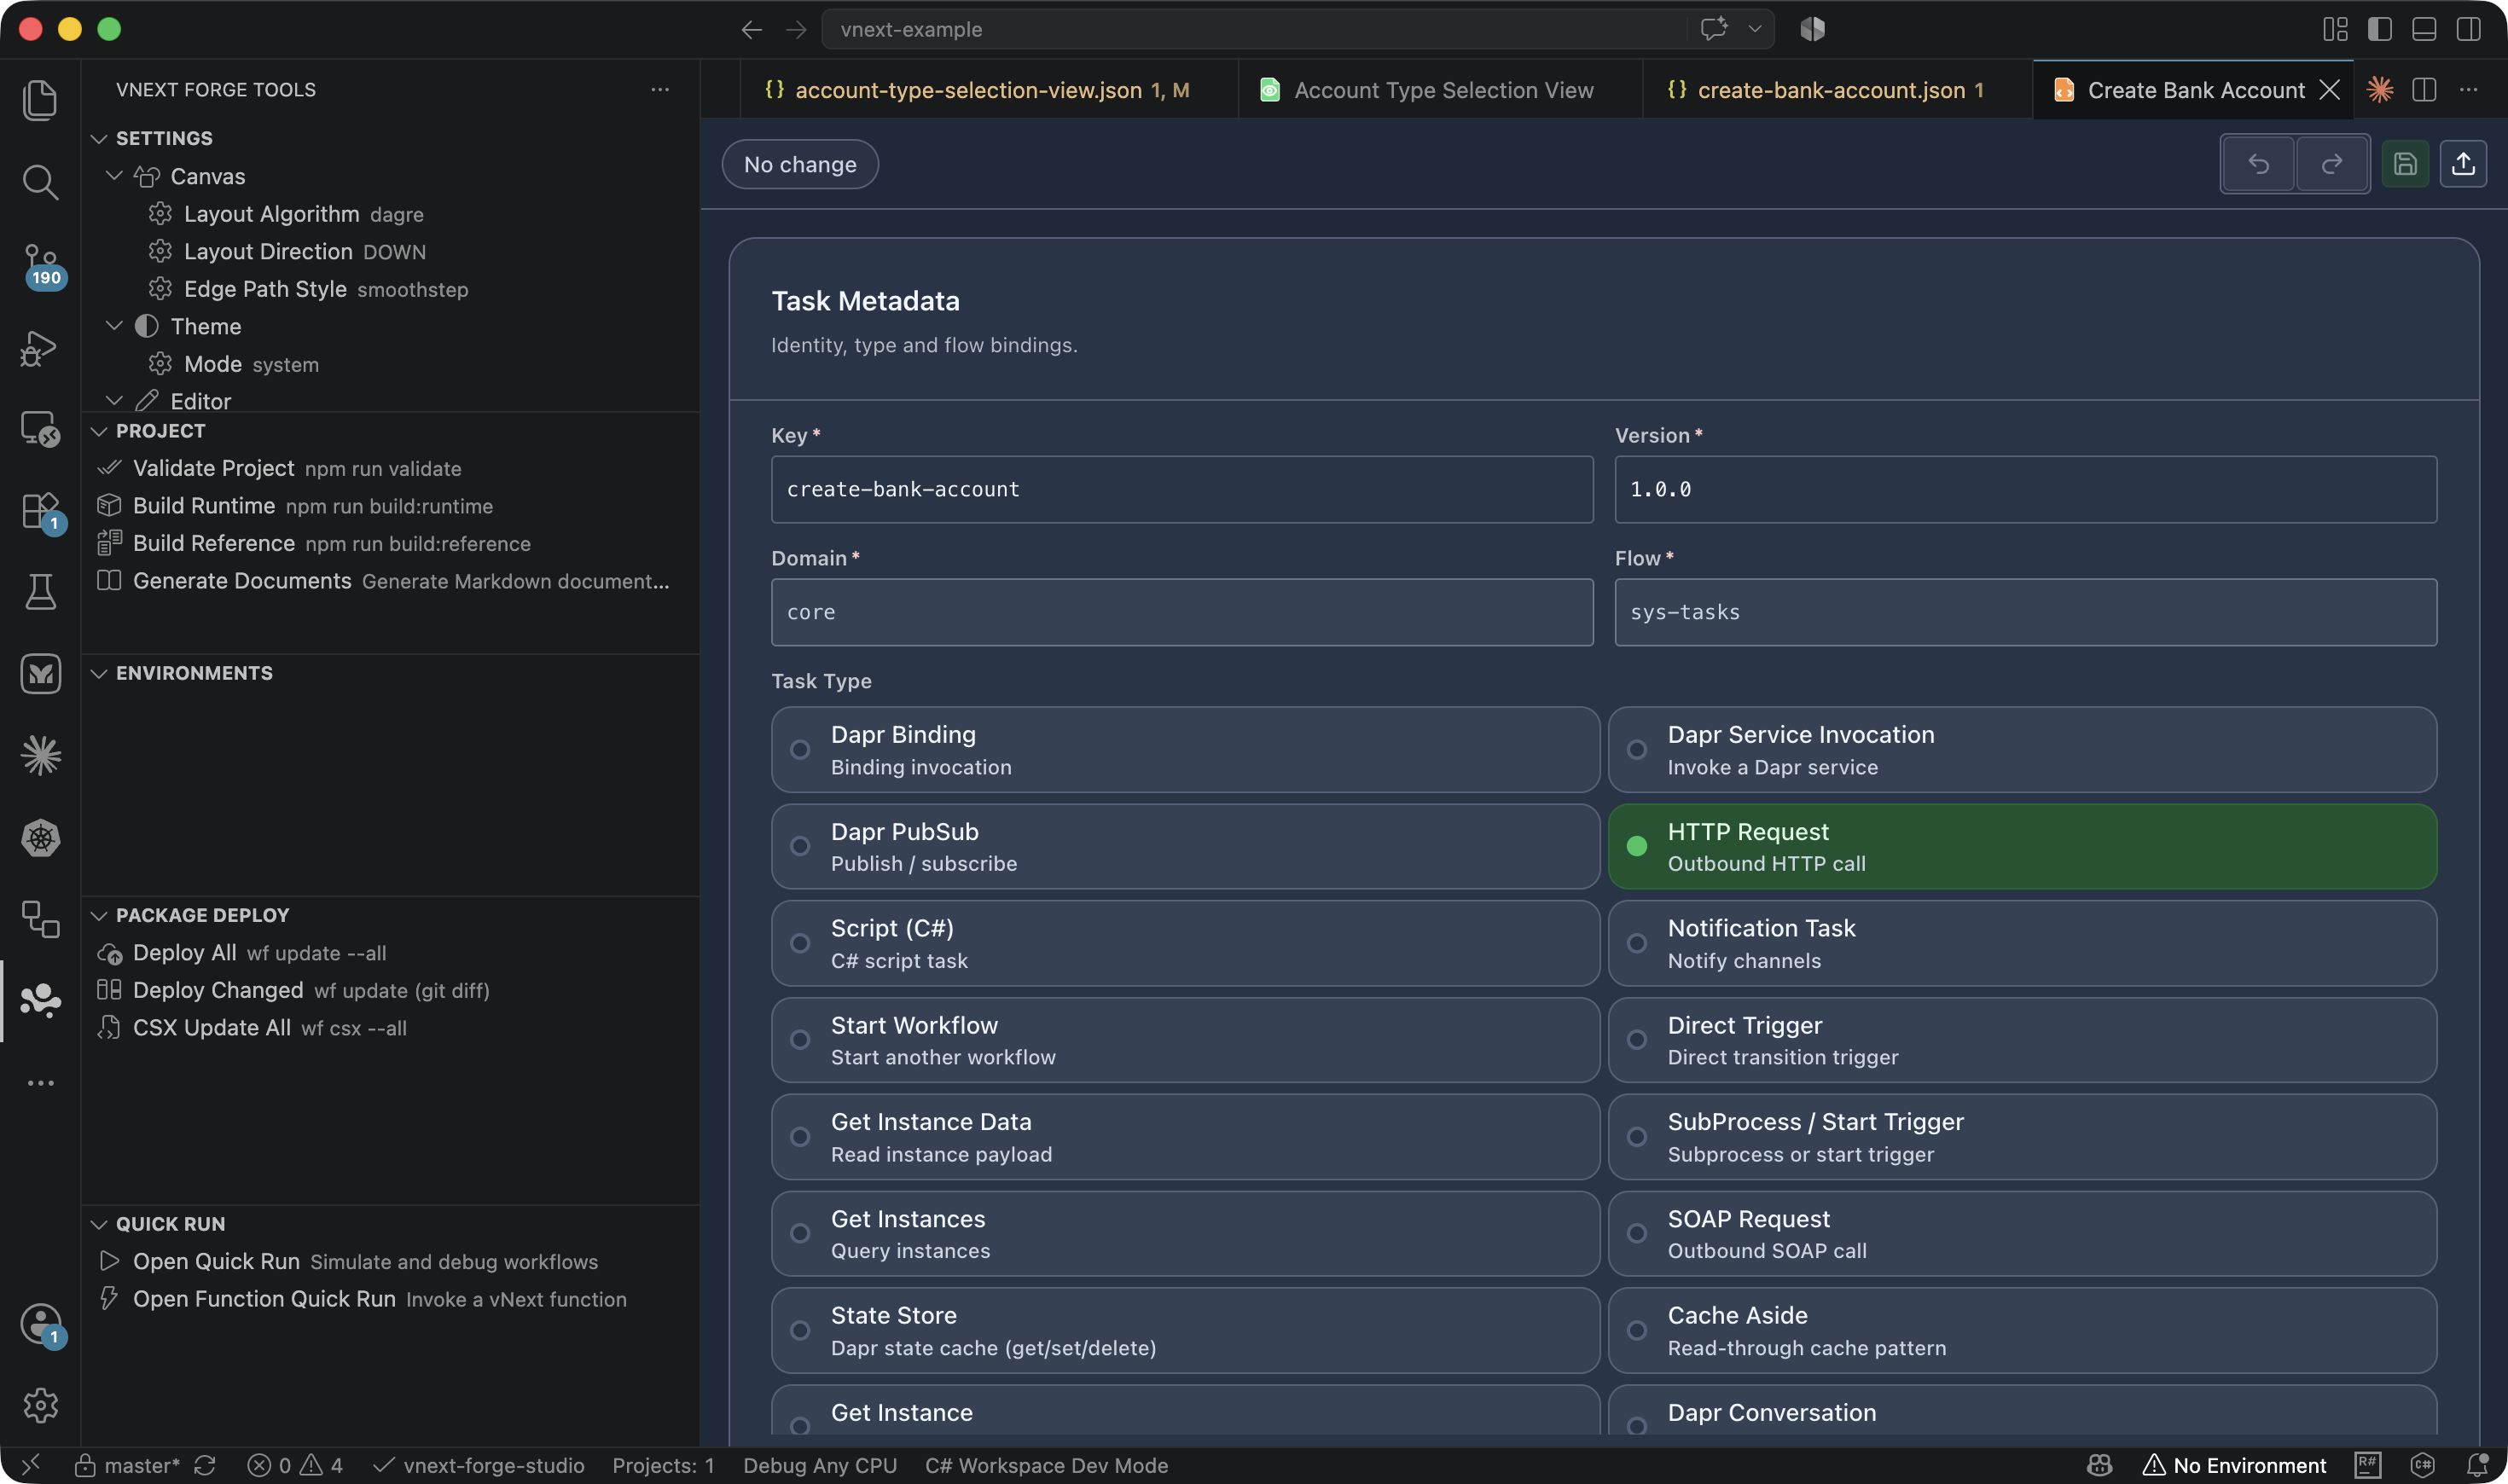
Below the metadata, the task type is picked as a card and the type-specific Configuration section follows — e.g. Method, URL, Body, Content-Type, Headers, Timeout, Validate SSL, and Accepted Status Codes for an HTTP task:
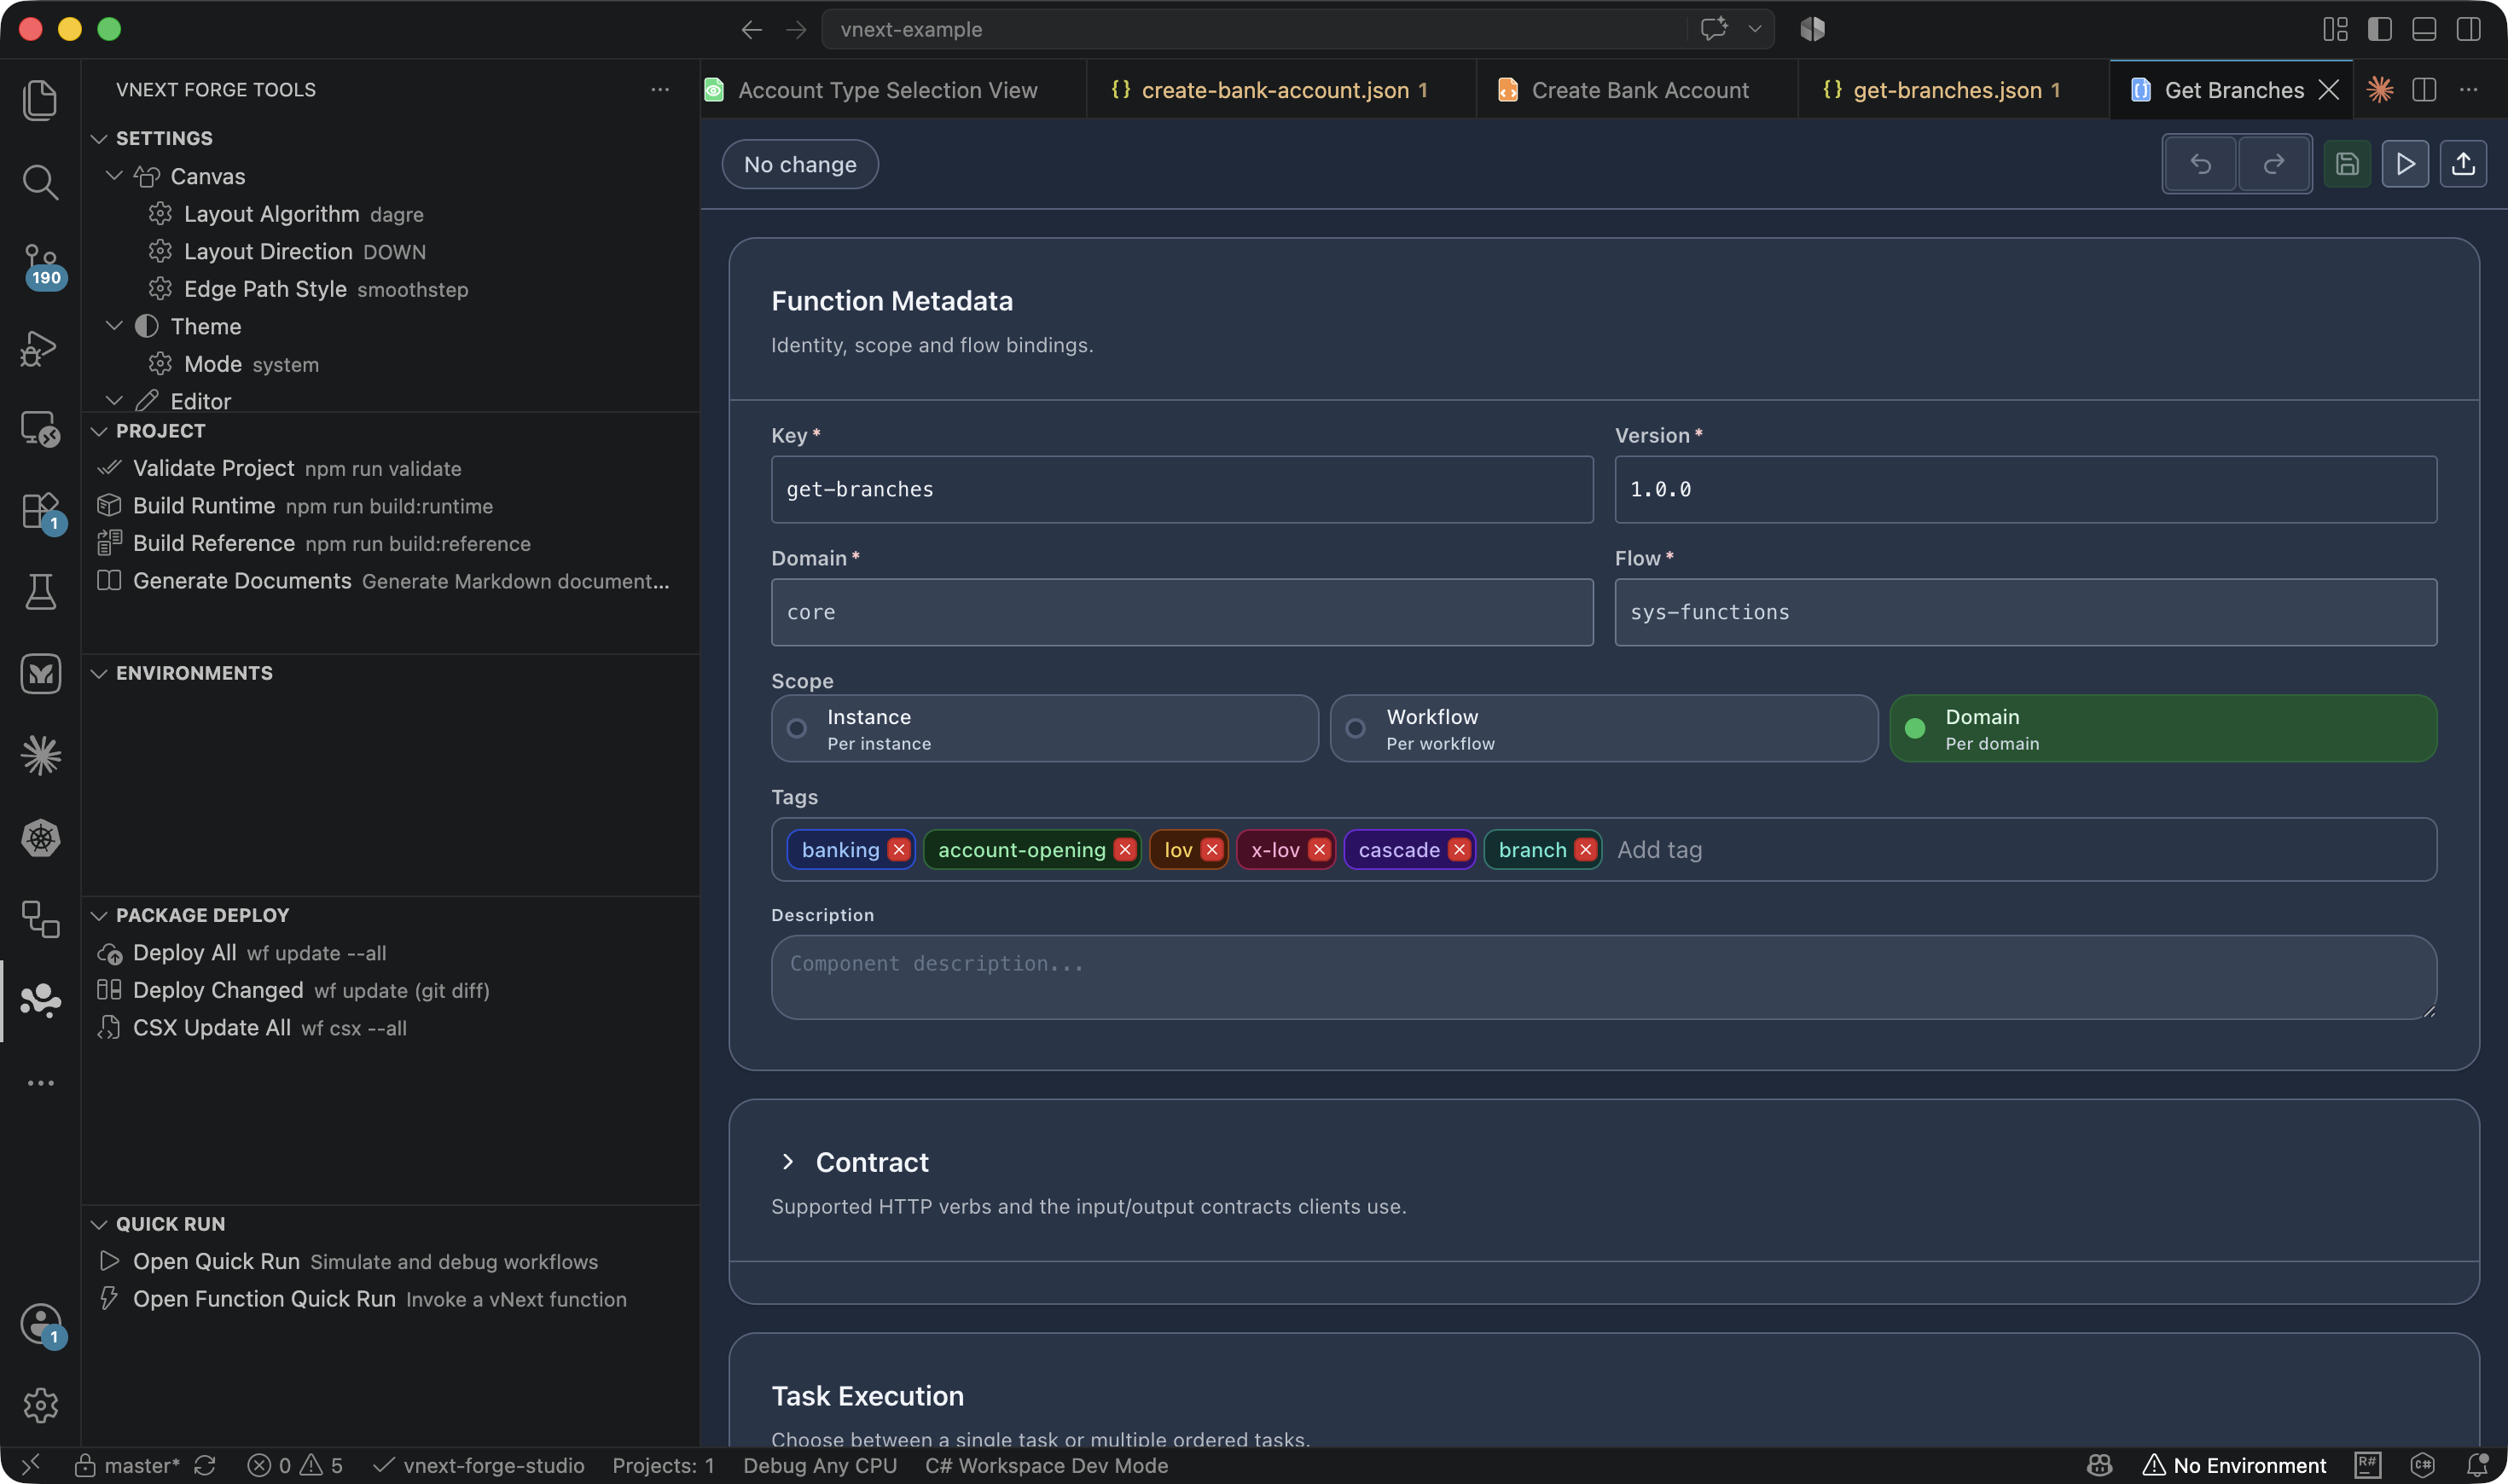
Function Editor
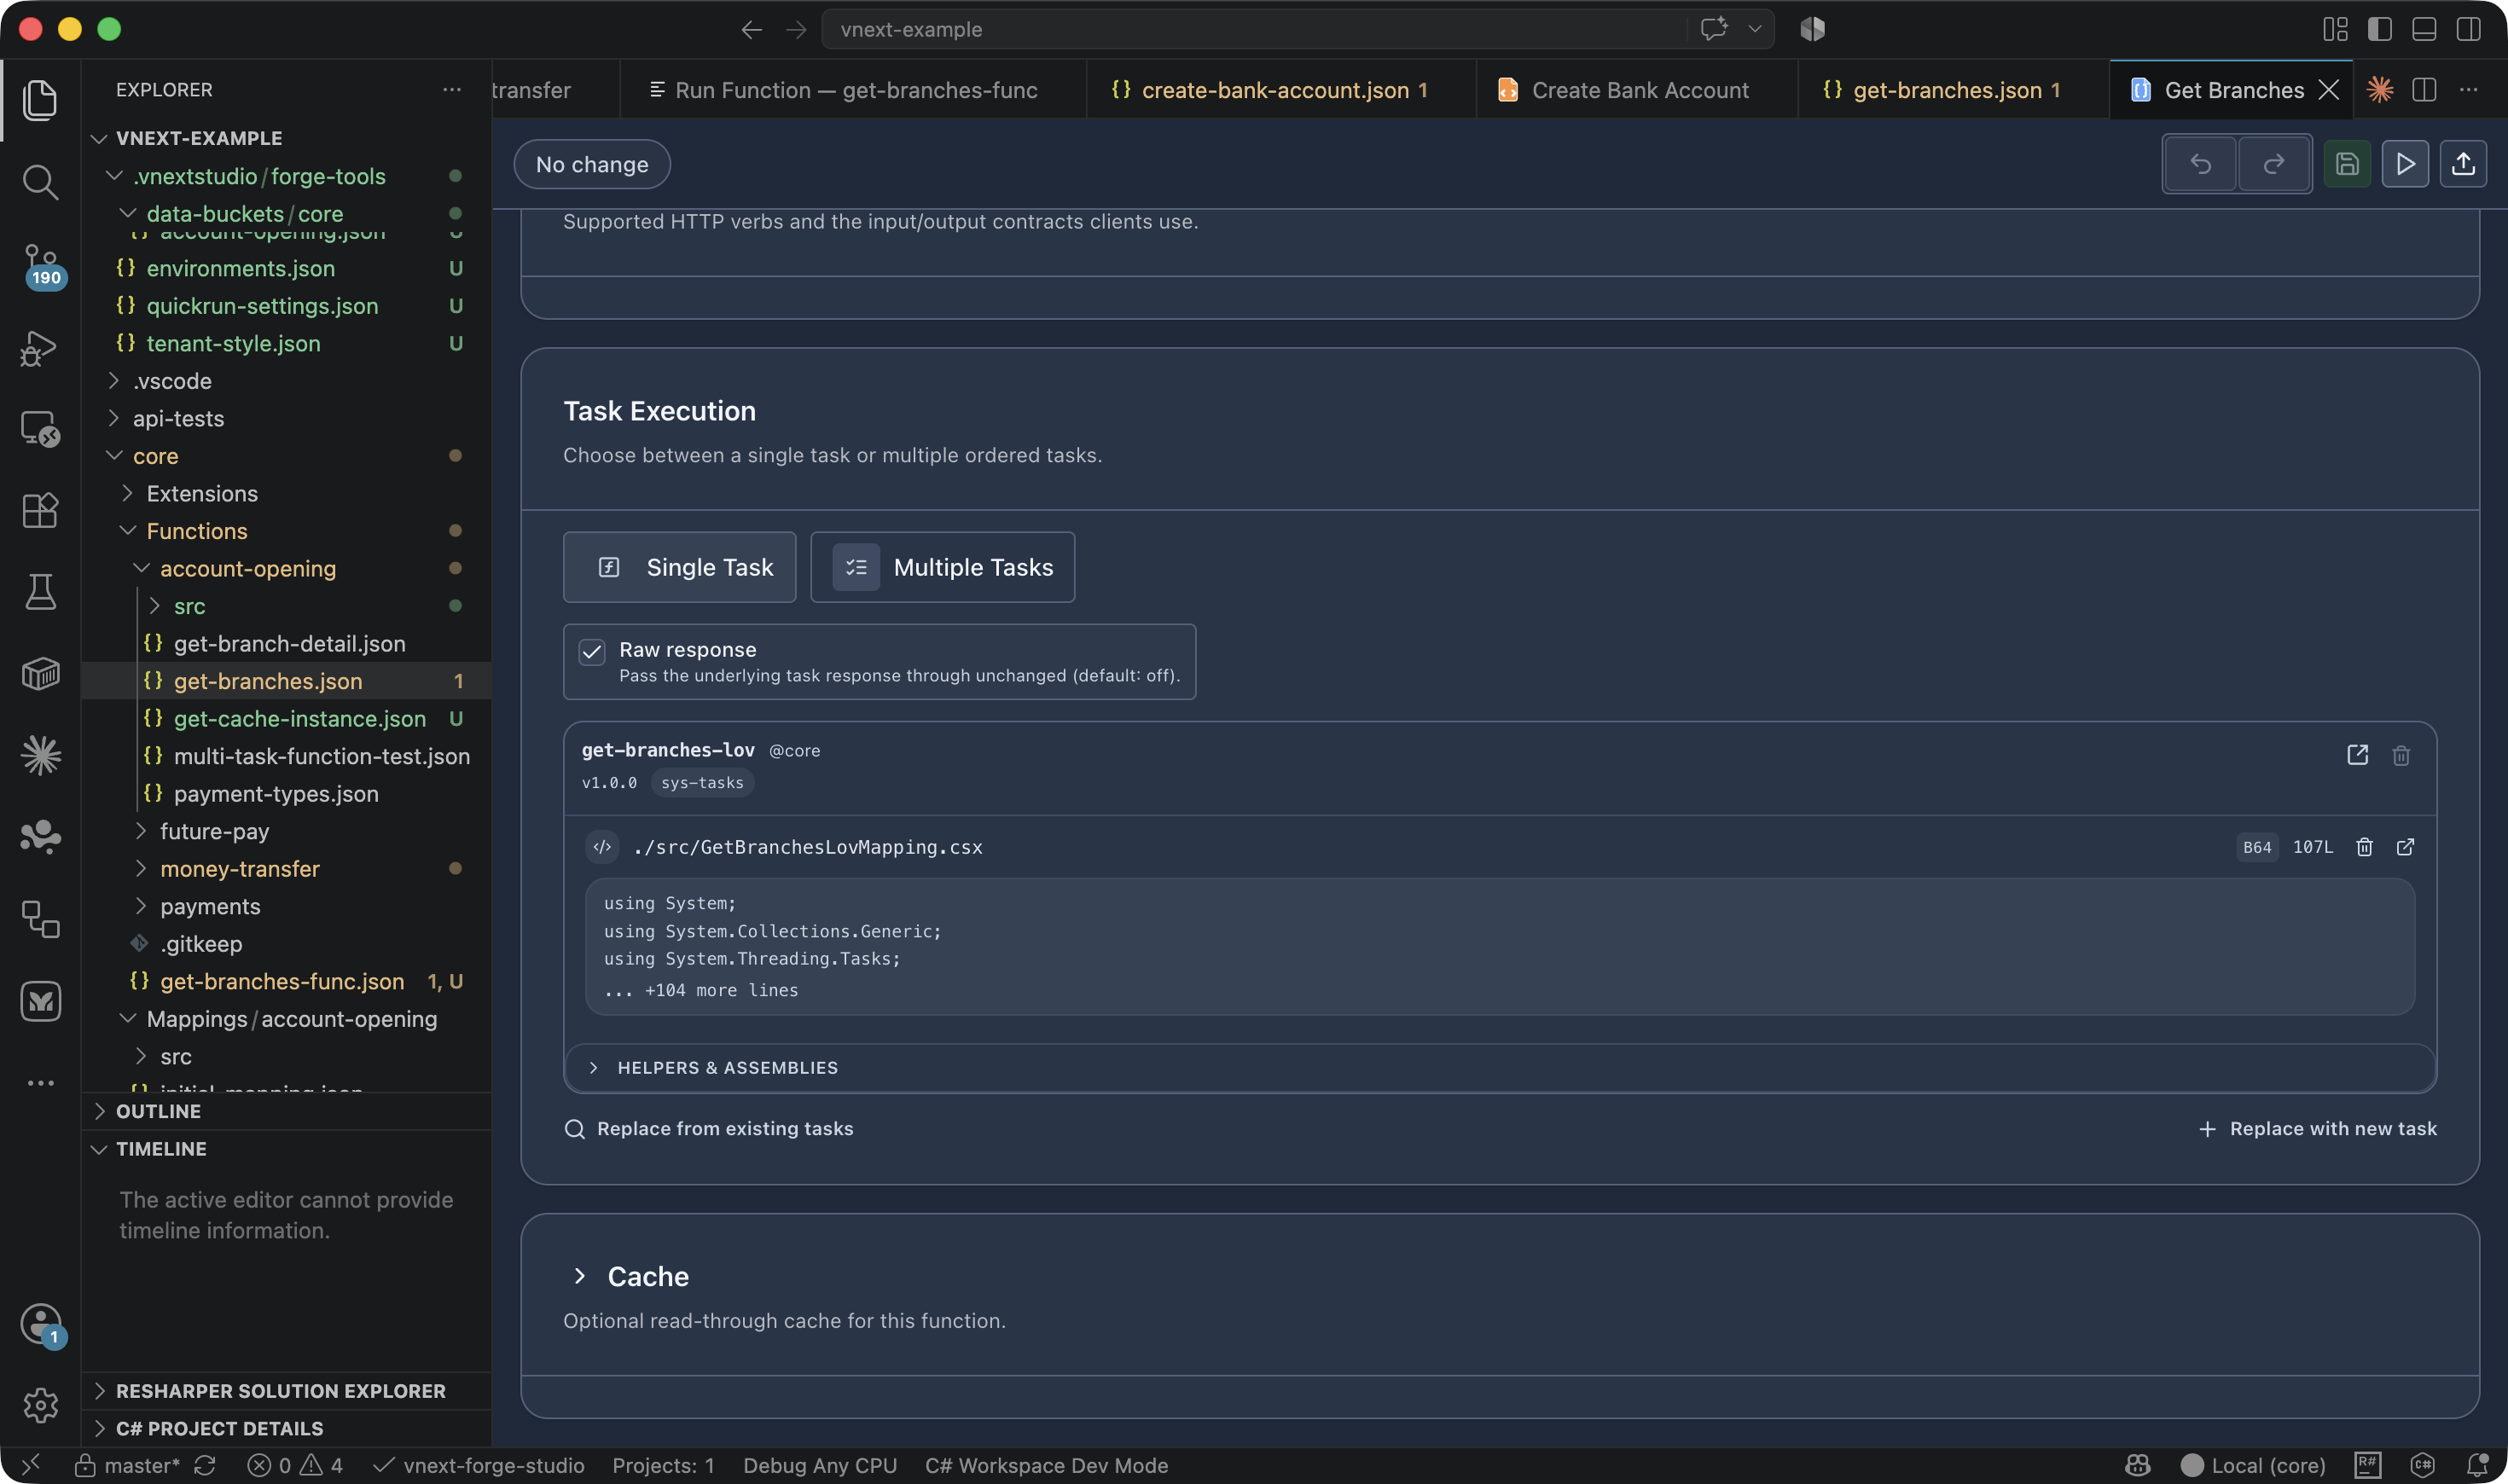
Manages the function scope (Domain/Flow/Instance), task composition, and IMapping/IOutputHandler script bindings.
The Task Execution section holds the Single Task / Multiple Tasks choice, the Raw response switch, the bound task with its .csx mapping preview (including Helpers & Assemblies), and the optional Cache configuration:
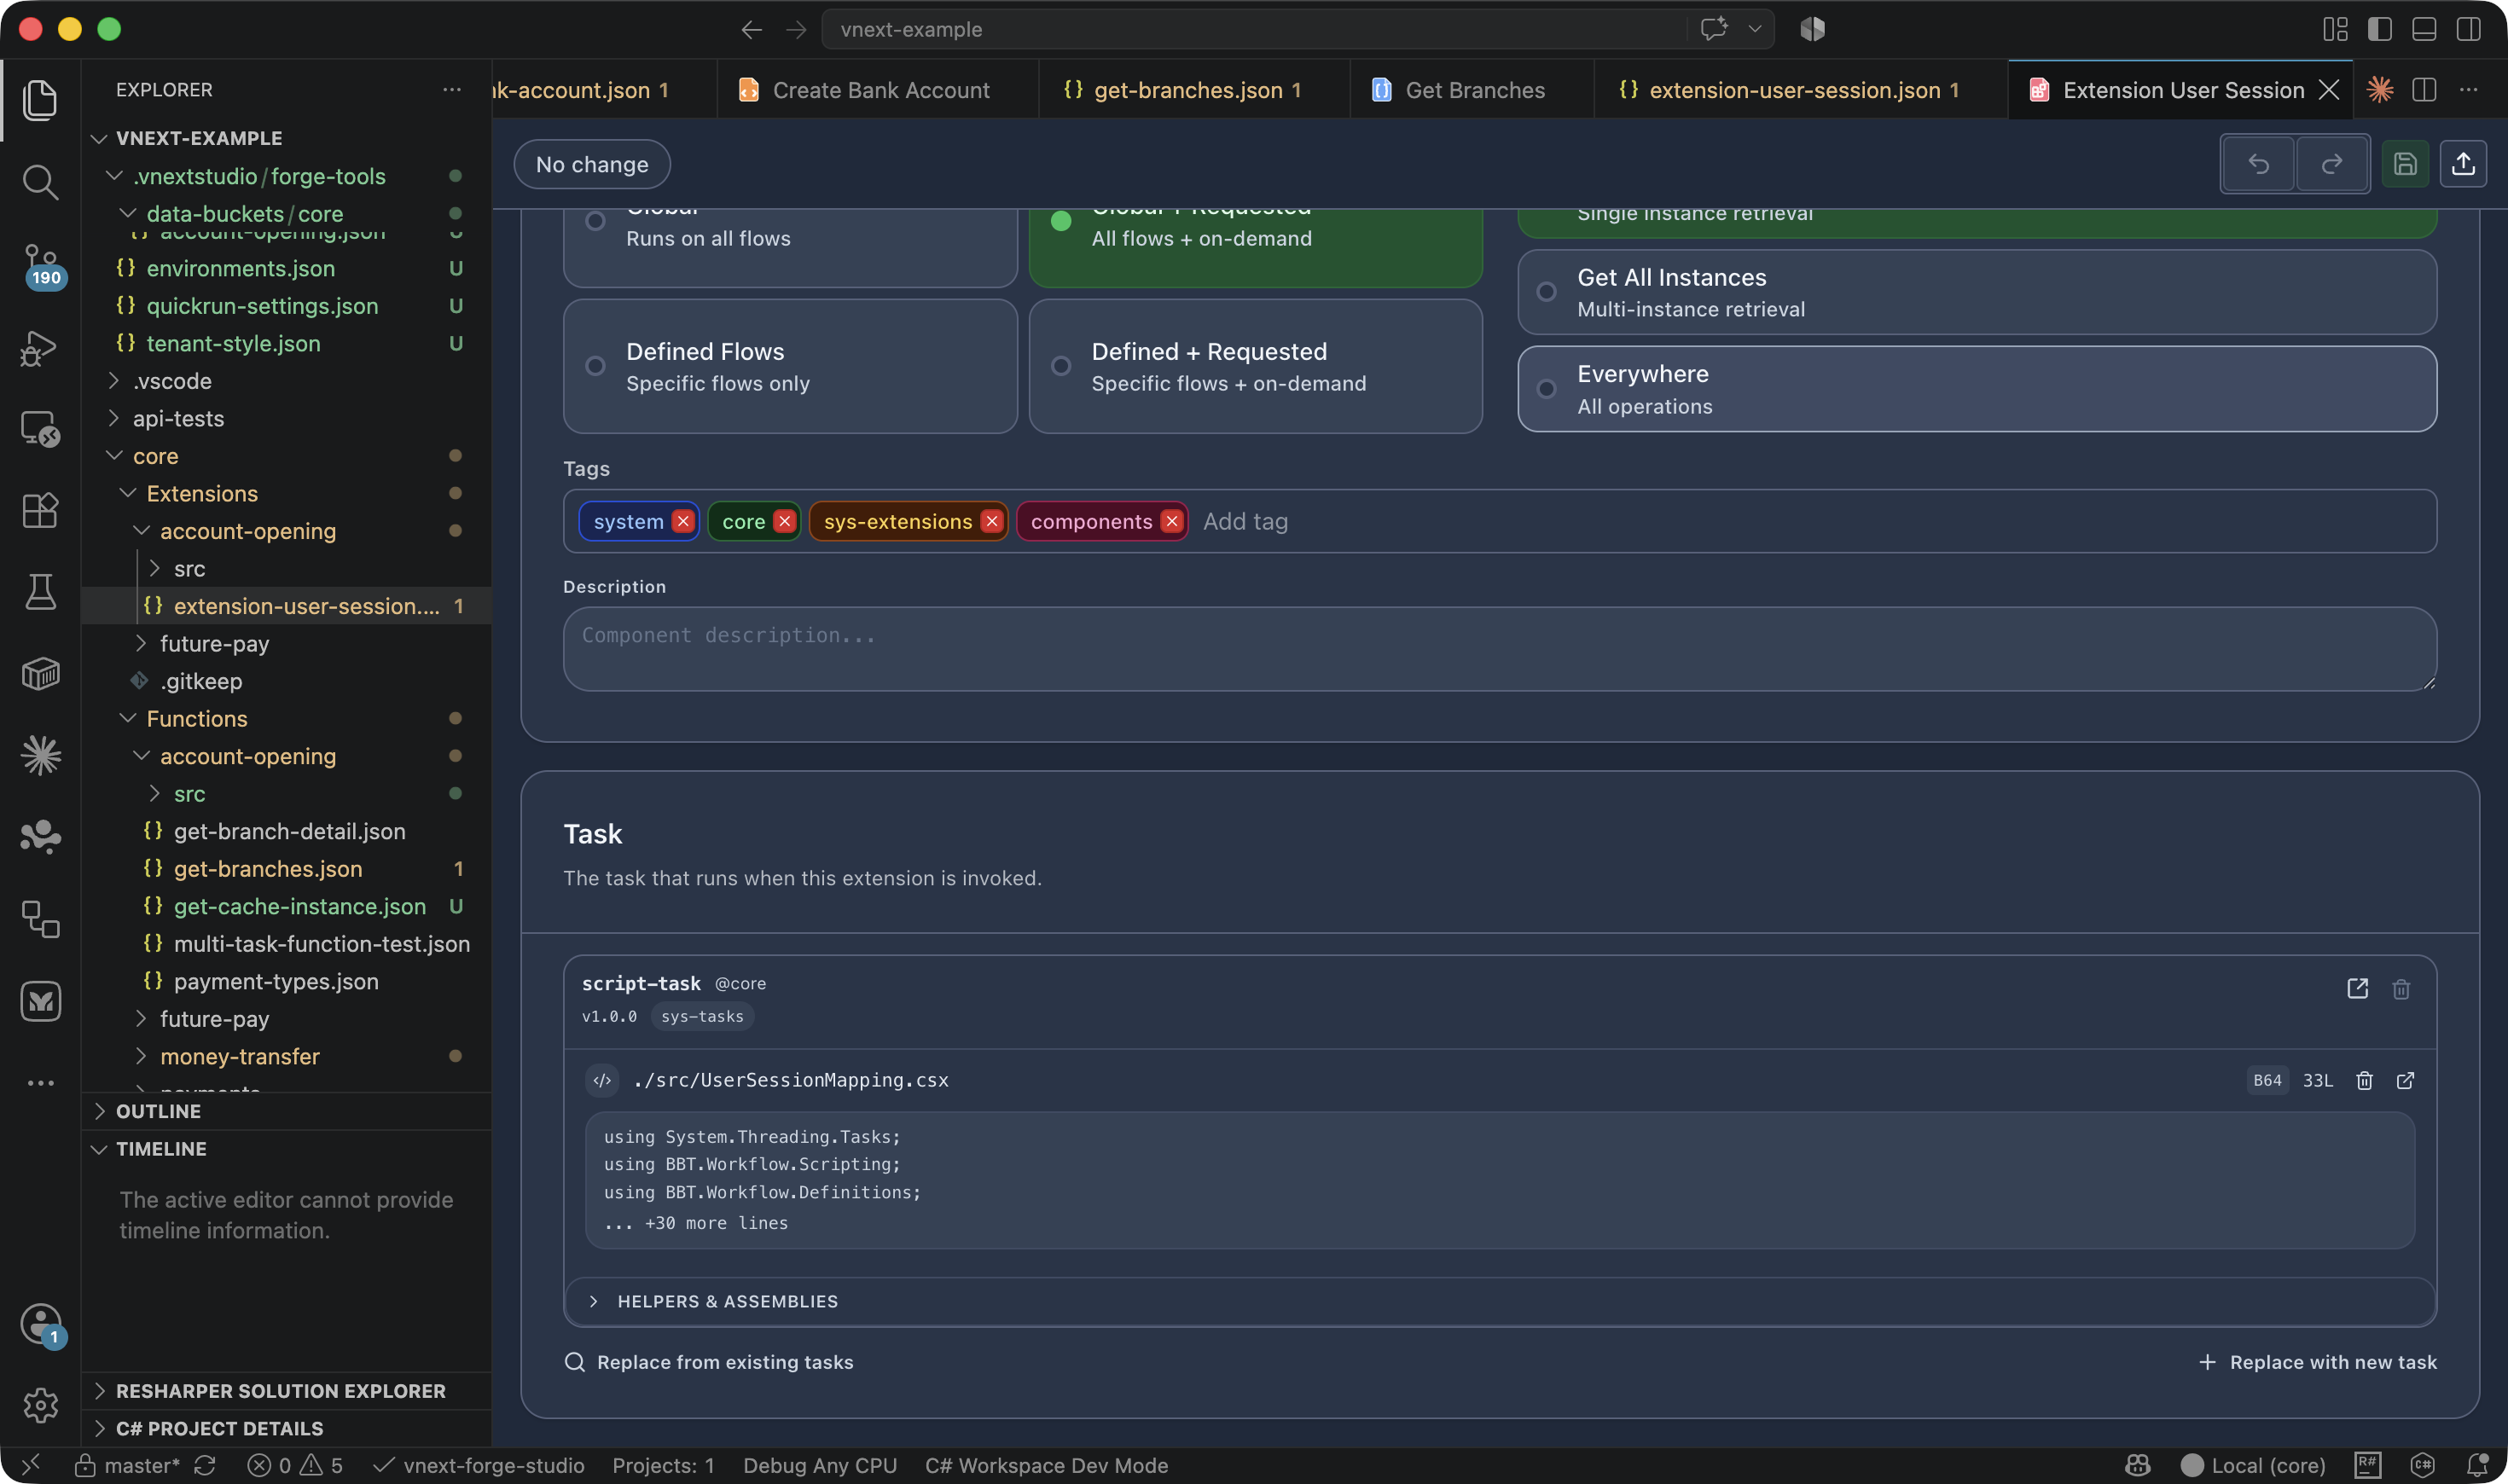
Extension Editor
Edits the extension type × scope matrix and target workflow bindings.
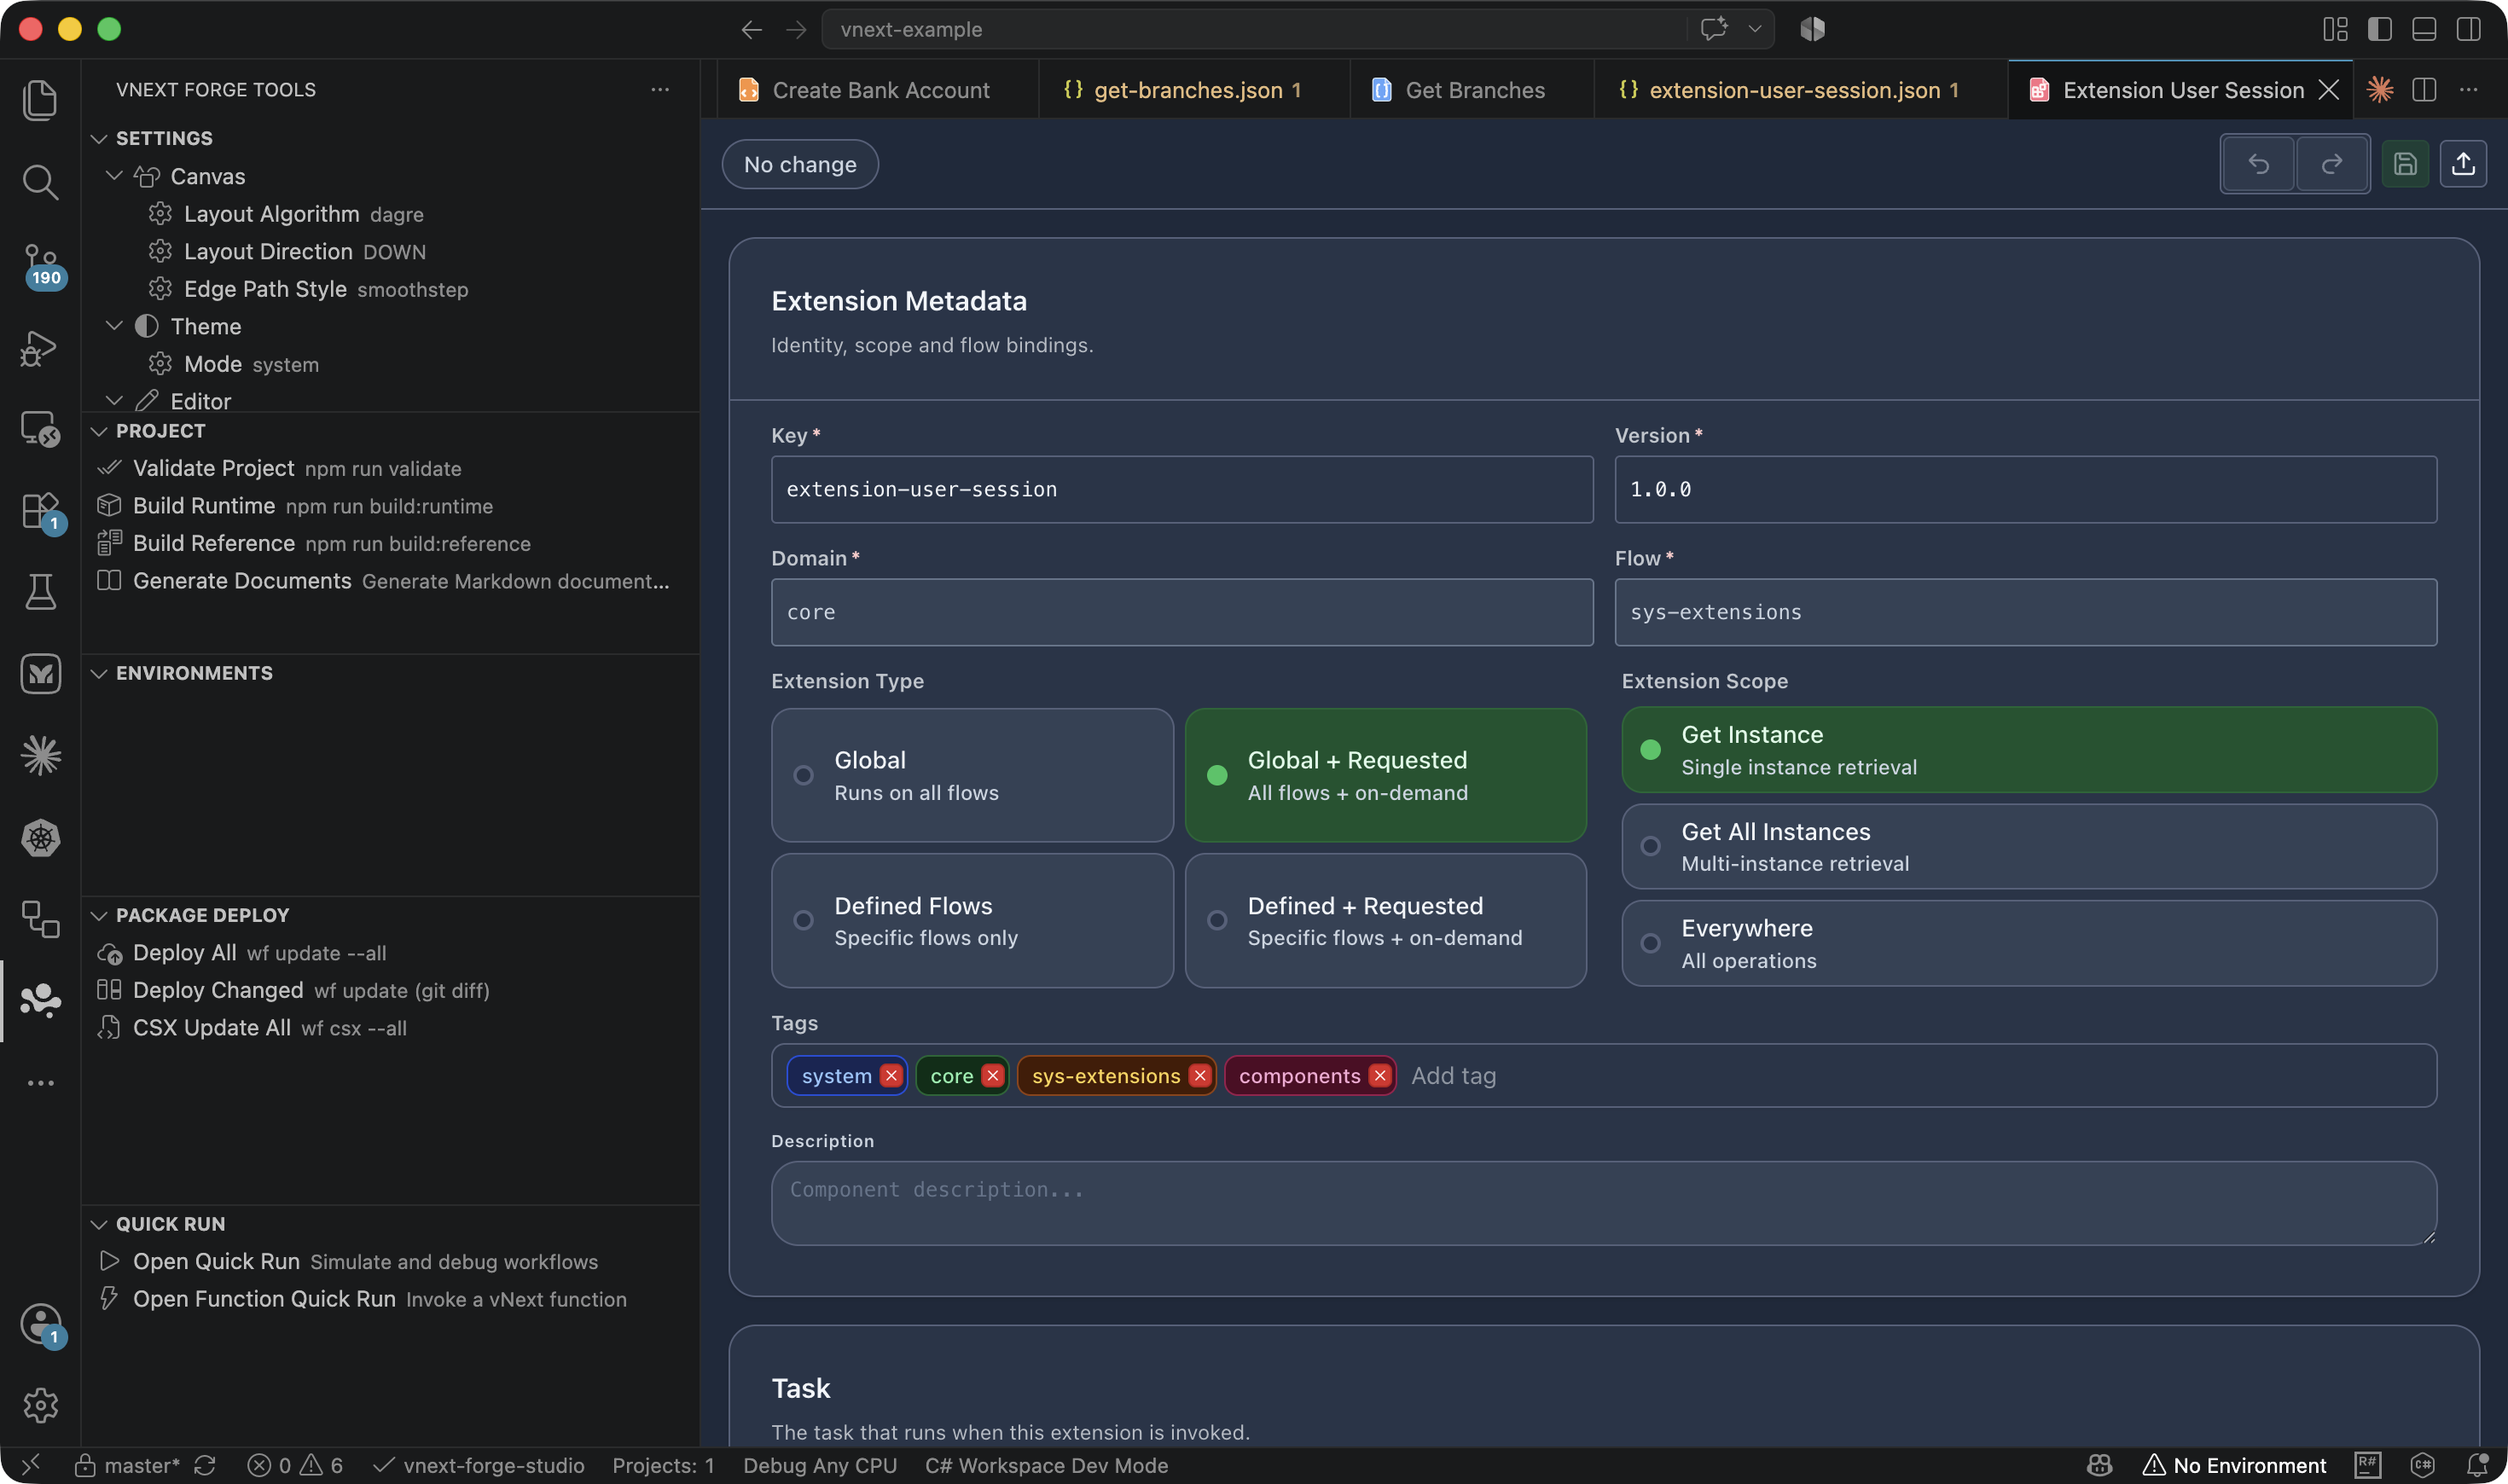
Below the scope cards (Global, Defined Flows, Everywhere…) sits the Task section that runs when the extension is invoked — with the bound script-task and its .csx source preview:
Mapping (CSX) Editor
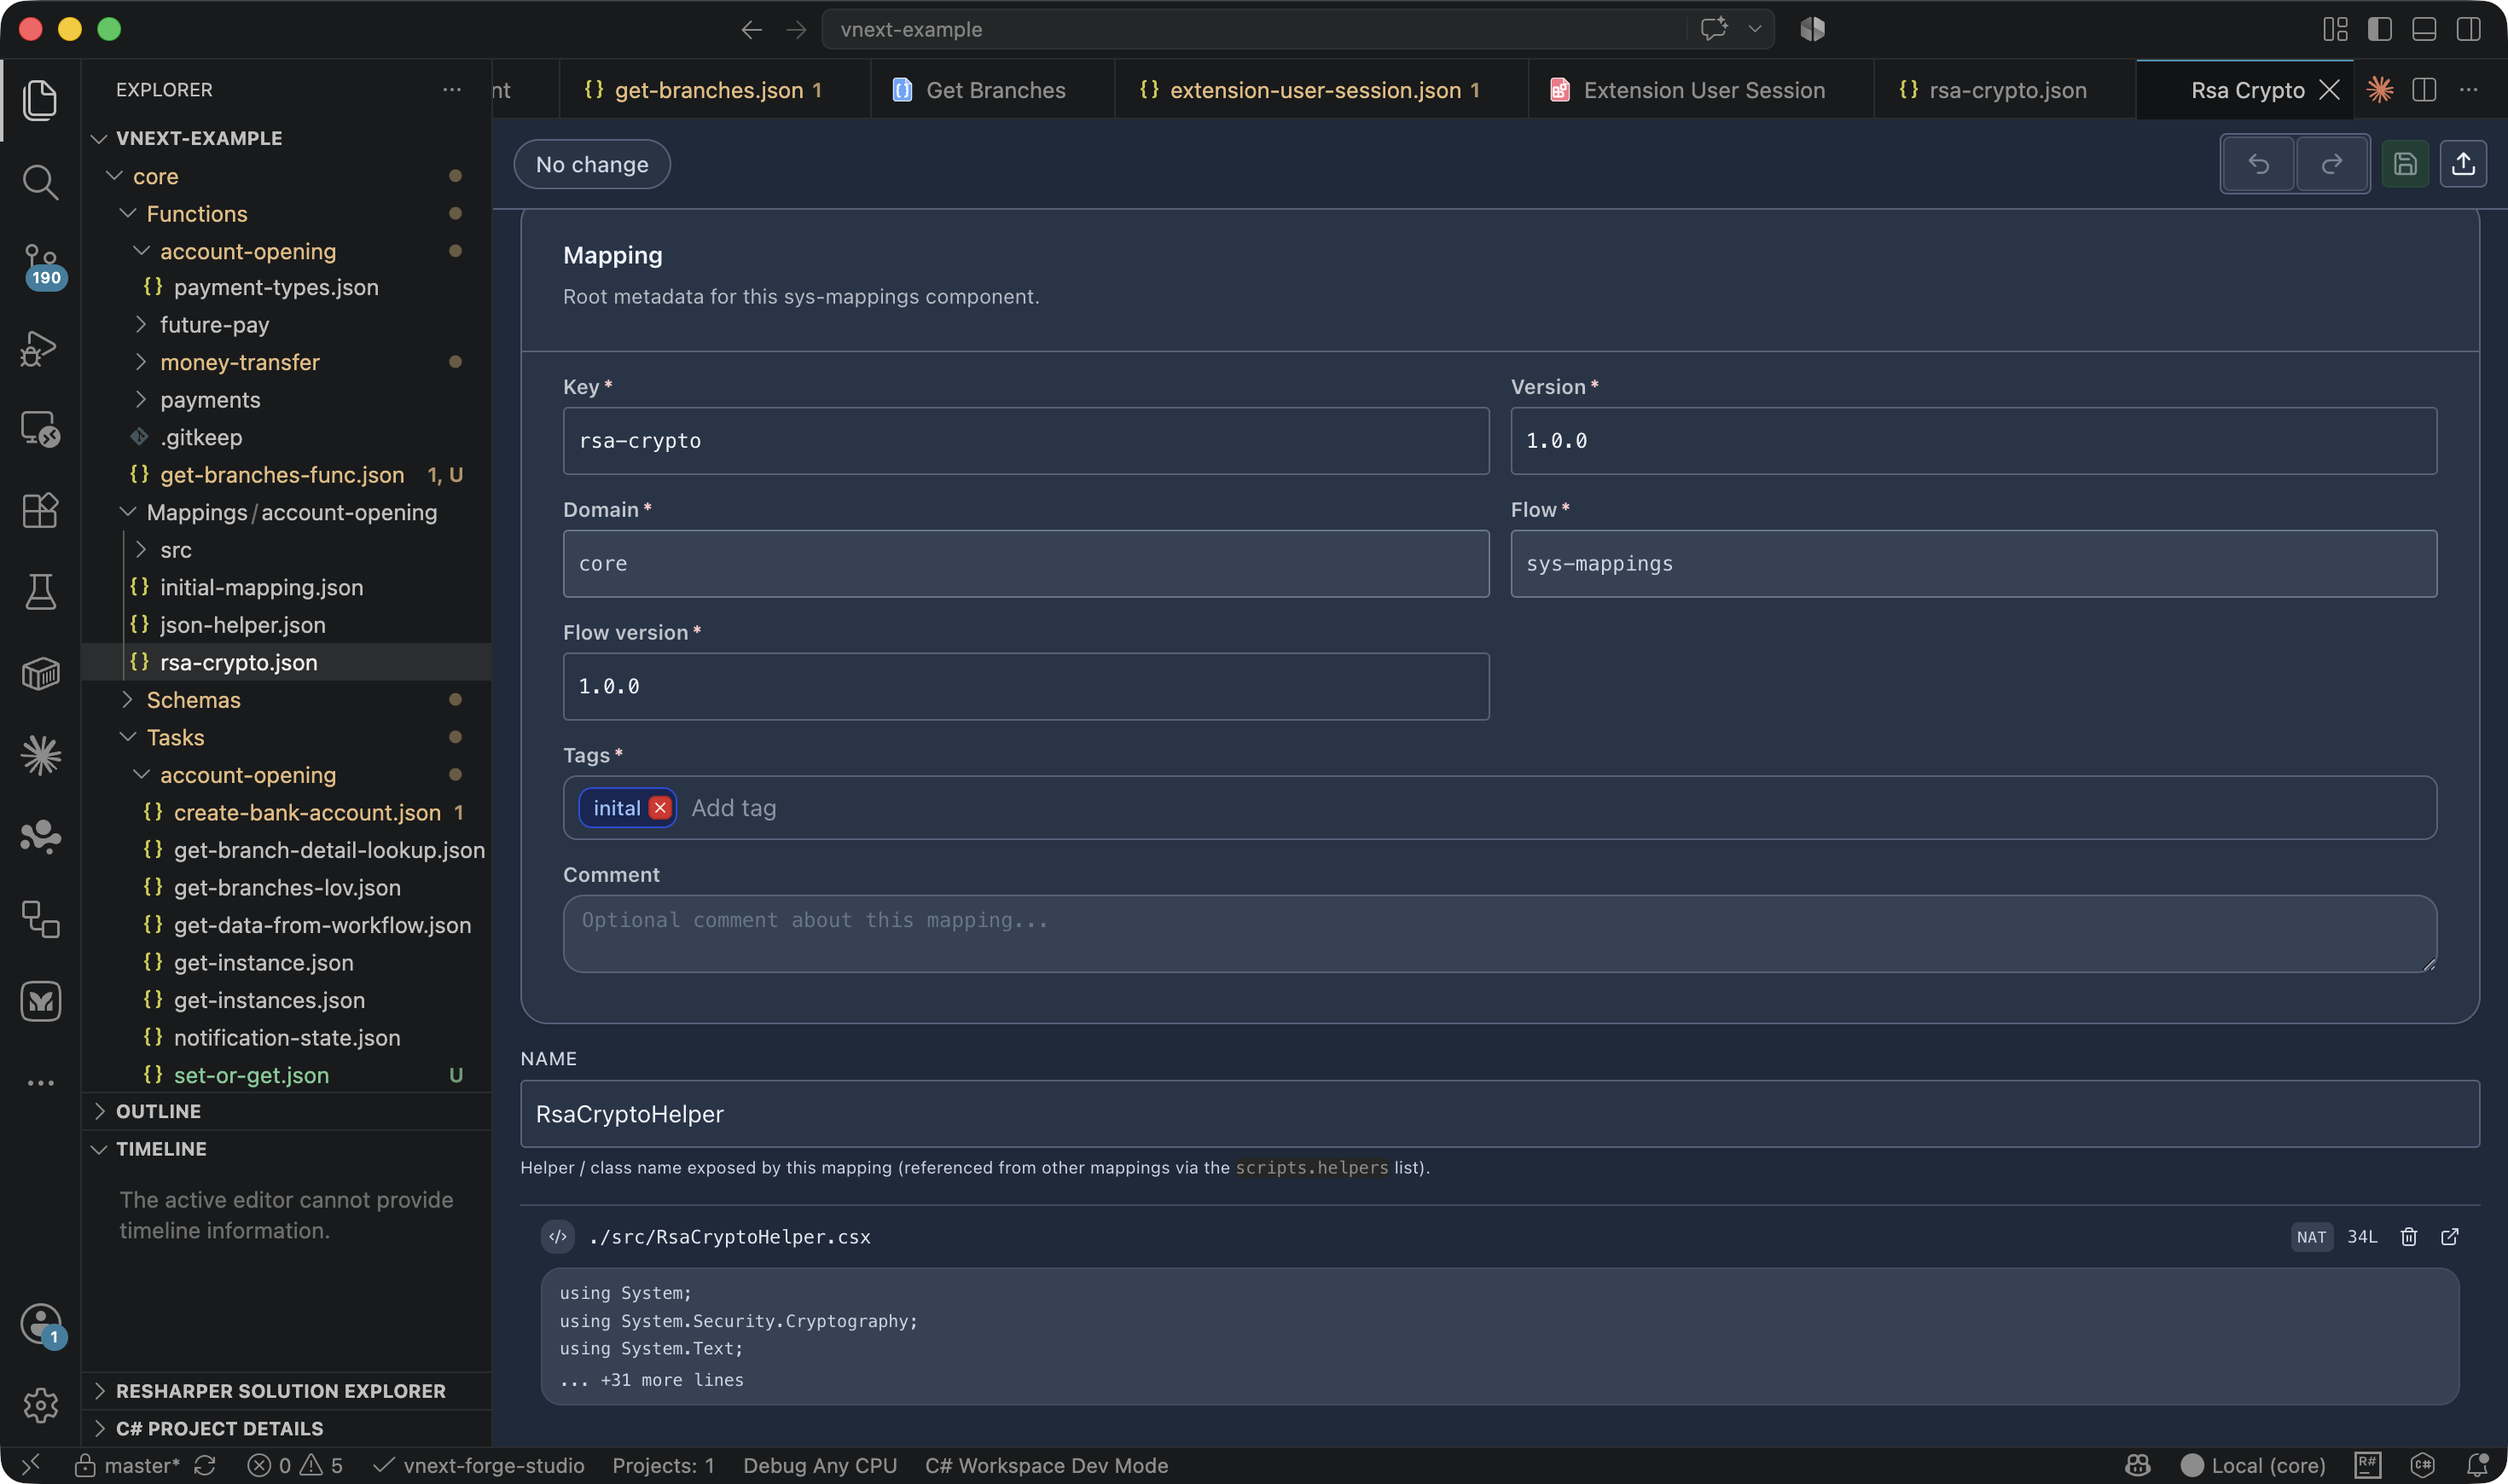
A C# script editor: syntax highlighting, IntelliSense, Snippet Quick Bar, and the C# API Reference panel. When the encoding field is set to REF, a sys-mappings component reference is used instead of embedded code, selected via a pickup dialog.
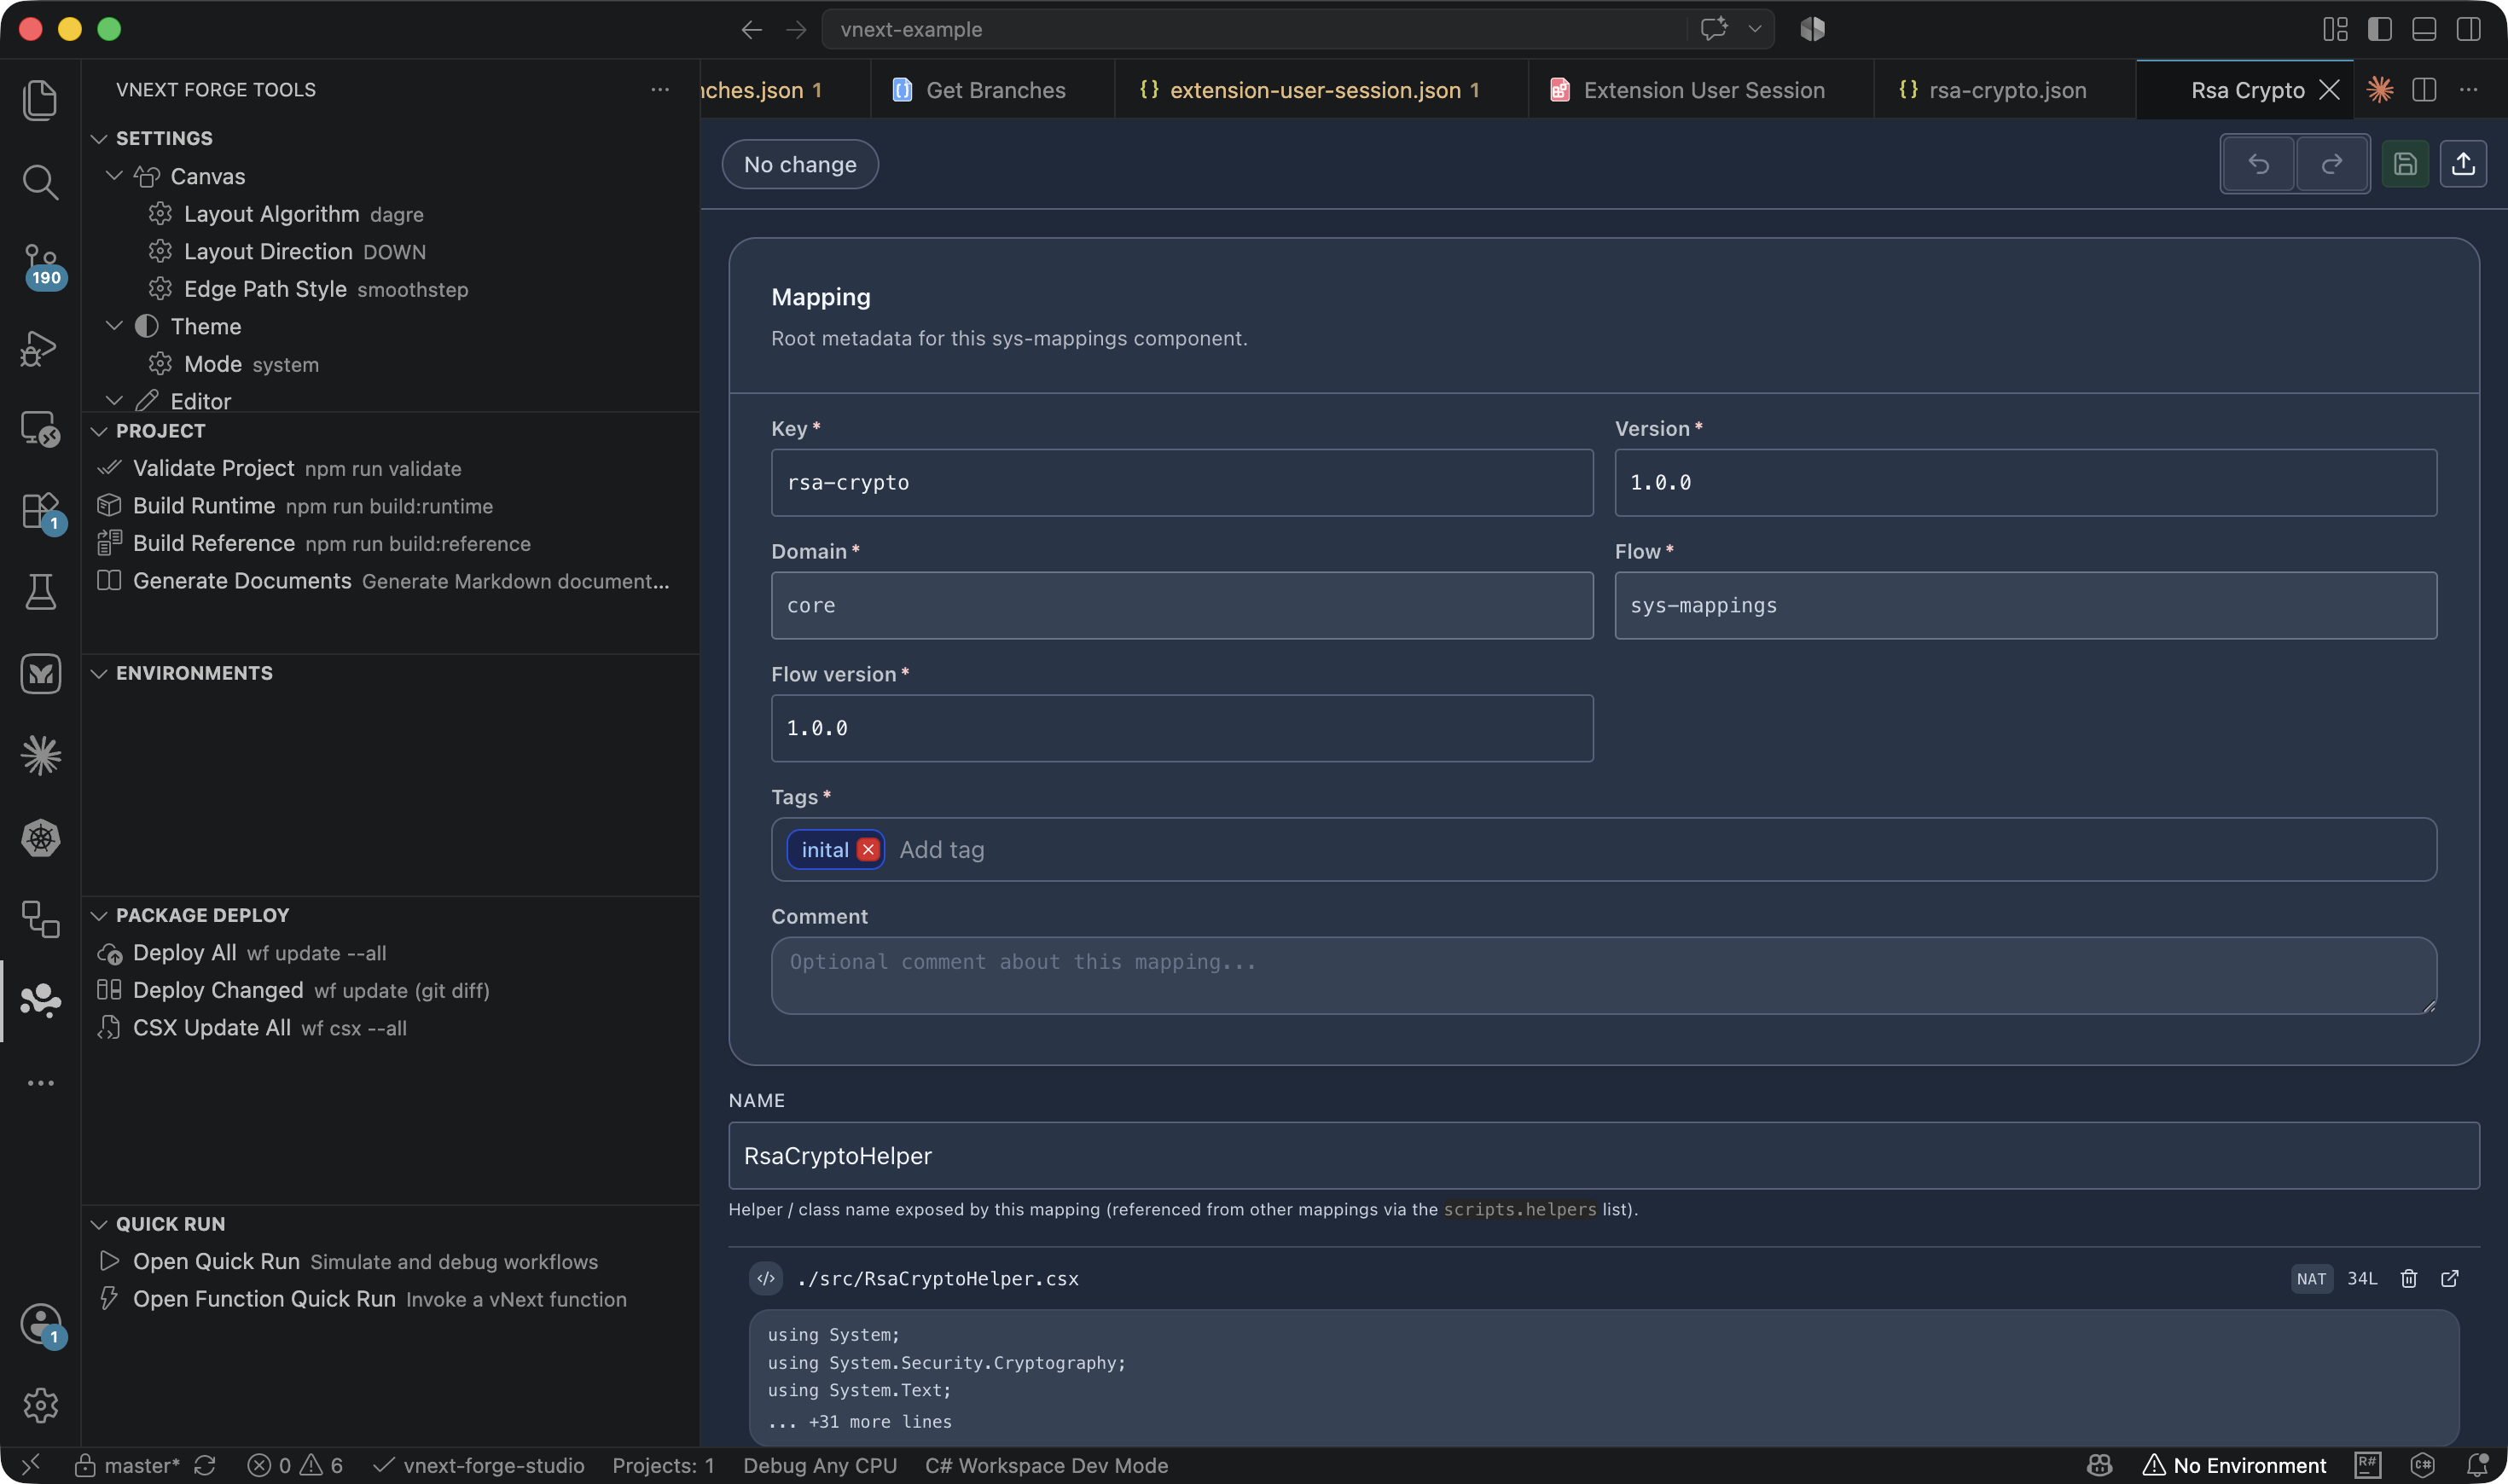
Below the mapping metadata are the helper class name (NAME, referenced via scripts.helpers) and a preview of the .csx source:
Publish and the CLI Relationship
Every deploy action in Forge runs the Workflow CLI (wf) behind the scenes — Forge is a visual shell over the CLI:
Practical consequences:
- The CLI must be installed — if it isn't, Forge detects that and offers to install it (details).
- The domain must be registered with the CLI — the Register with Workflow CLI action on the local environment does this. Without the registration, publishing fails; Forge shows a warning on the environment row.
- Error messages come from the CLI — for fixes to errors seen during publish, consult the
vnext-workflow-clidocumentation (DB connection, credentials, Docker requirements, etc.).
When working on a single component, right-click → Publish is the fastest path. If several components changed, use Package Deploy → Deploy Changed; reserve Deploy All for seeding an environment from scratch.
Related Pages
- vNext Forge Studio — overview and installation
- Development Environment Setup (Forge) — the initial setup flow
- Workflow CLI —
wfcommand reference - AI-Assisted Development — the vNext AI Toolkit